Back Office: Inventory - Adjust Inventory Reasons
Navigation: Sign
into the Back Office. On
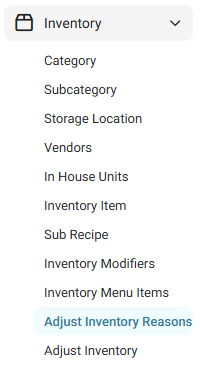
the left-side, select Inventory then Adjust Inventory
Reasons.
The Adjust Inventory Reasons page appears, with the previously created Adjust Inventory
Reasons appearing in a table which contains the following columns:
- Name – The name of the Reason.
- Type – The type of Reason (Increase, Decrease or Adjustment).
- Default – Whether this is the default reason for an adjustment (True or False).
- Action – The Edit (pencil) or Delete (trash can) options are available.
Create or Update a Reason
- Click + New Adjustment Reason at the upper-right to create a new Reason (or identify the existing Reason to delete, then under Actions click the corresponding Edit (pencil) button.
- On the New/Update Reason pane that appears:
- Name – (Mandatory) Enter the name of the new Reason (maximum of 25 characters).
- Default – Indicate whether this will be the default Reason (YES or NO).
- Select the Reason Type:
- Adjusted – Selected when an item is being Adjusted.
- Increase – Selected when an item is being Increased.
- Decrease – Selected when an item is being Decreased.
- When ready, click Save (or Update) at the bottom-right.
- Cancel/Close – If selected, the Reason won’t be created and the pane will be closed.
- You're returned to the main Adjust Inventory Reasons page, where the confirmation banner appears at the upper-right. If a new Reason was created, it will be added as a row in the table.
Delete (Deactivate) A Reason
- Identify the Reason to delete, then under the Actions column click the corresponding Delete (trash can) button.
- On the Delete pop-up that appears, select Delete to confirm deleting the Reason.
- To cancel deleting the Reason and keep it as Active, click Cancel or X Close.
- You're returned to the main Adjust Inventory Reasons page, where the confirmation banner appears at the upper-right and the deleted (deactivated) Reason will be removed as a row in the table.
Related Articles
Retail Back Office: Inventory - Adjust Inventory Reasons
Navigation: Sign into the Back Office for your Retail Store, then select Inventory > Inventory Reasons. The Adjust Inventory Reasons screen appears, with the created Reasons appearing in table format containing the following columns: Name – Displays ...Back Office: Inventory - Adjust Inventory
Navigation: Sign into the Back Office. On the left-side, select Inventory then Adjust Inventory. The Adjust Inventory page appears, with tabs for Inventory Item, Retail Item and Sub-Recipe. At the upper-right, buttons for Download Template, Upload ...Retail Back Office: Inventory - Adjust Inventory
Navigation: Sign into the Back Office for your Retail Store, then select Inventory > Adjust Inventory. The Adjust Inventory screen appears, with the Retail Item tab. Buttons for Download Template, Upload Inventory Count, and + Bulk Adjustment appear. ...Back Office: Inventory Reports
Navigation: Log into the Back Office and select a Store. On the left side, select Reports > Inventory Reports. On the Inventory Reports dashboard, select a tab: Master Stock Purchased Item Consumption Log Compare Inventory Count Sheet COGS Adjust ...Reatil Back Office: Inventory Reports
Navigation: Log into the Back Office for your Retail Store, then select Reports > Inventory Reports. The Inventory Reports page is organized into multiple tabs: Master Stock Purchased Item Consumption Log Compare Inventory Count Sheet COGS Adjust ...