Back Office: Customers - Membership
- Sign
into the Back Office and select a Store.
- On
the left-side Navigation Panel, click Customers then Membership.
- The Membership page appears, containing tabs for Type (Default), Plan and Account. All three tabs will have some similar functionality:
Type Tab
Displays
a table containing the added membership types, with the following columns: Date, Type, Description, and Actions.
- Actions
- Edit (pencil) – The Update
Membership Type pane appears. See Step 2) below.
- Delete (trash can) – The Delete pop-up appears, with buttons to Delete or Cancel / X Close.
If Delete is selected, the Type will be deleted. If either of the
other two options are selected, the Type will remain.
- To create
a new Membership Type click + Membership Type at the upper-right
– or Edit an existing Membership Type by clicking the
corresponding Edit (pencil) button of an existing Type.
- The New/Update
Membership Type pane appears, with the following fields:
- Type – (Mandatory)
Enter the name of the Type. It must be a unique name (not identical to an
existing Type) that cannot exceed 25 characters.
- Price
Level – (Mandatory) Select the price level of the type, with the default
level auto-selected. Only one option can be selected.
- Description – Enter
a description of the Type (if necessary). No character limit.
- When finished creating (or updating) the Type, click Save (or Update).
- Save will be disabled by default until both mandatory fields are filled in, while
- Update will be disabled until an update is made.
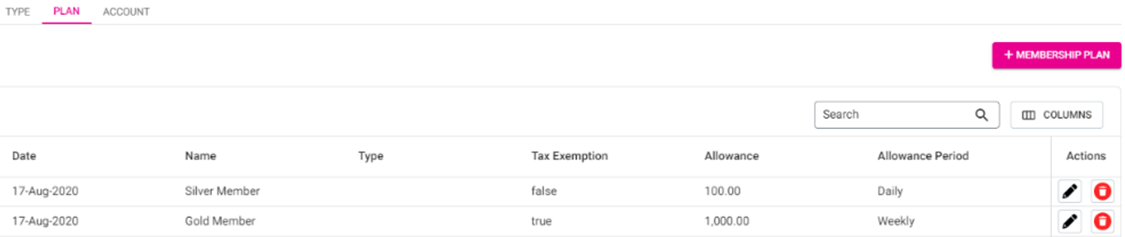
Plan Tab
Displays
a table containing the membership plans, with the following columns: Date, Name, Type, Tax Exemption, Allowance, Allowance Period, and Actions.
- Actions
- Edit
(pencil) – The Update Membership Plan pane appears. See Step 2) below.
- Delete
(trash can) – The Delete pop-up appears, with buttons
to Delete or Cancel / X Close. If Delete is
selected, the Plan will be deleted. If either of the other two options
are selected, the Plan will remain.
- To create
a new Membership Plan click + Membership Plan at the upper-right
– or Edit an existing Membership Plan by clicking the
corresponding Edit (pencil) button of an existing Plan.
- The New/Update
Membership Plan pane appears, with the following fields:
- Name –
(Mandatory) Enter the name of the plan. It cannot exceed 25 characters.
- Type –
(Mandatory) Select the Type from the list of existing Types (previous
tab).
- Allowance – Enter
the value of the allowance for the plan (numbers only).
- Allowance
Period – (Mandatory) Select the allowance period for the
plan from the dropdown.
- Monthly – The plan will have a monthly allowance period, with the Allowance amount being charged monthly.
- Quarterly – The plan will have a quarterly allowance period,
with the Allowance amount being charged quarterly.
- Half-Yearly – The plan will have a 6-month allowance period,
with the Allowance amount being charged every 6 months.
- Yearly – The plan will have a 12-month allowance period, with the Allowance amount being charged every 12 months.
- Tax
Exemption – If Enabled (set to YES), the Tax
Exemption will be included for the membership plan. If disabled, there will
be no Tax Exemption.
- Allowance
Overdraft – The additional or extra amount more than the
allowance amount can be used for the respective membership plan. Only numbers
can be entered and no limits of digits in this field.
- When
finished creating (or updating) the Type, click Save (or Update).
- Save will be disabled by
default until both mandatory fields are filled in, while
- Update will be disabled until an update is made.
Account Tab
Displays
a table containing the membership accounts, with the following columns: Customer, Card Number, Membership Plan, Balance Amount,
and Actions.
- Actions
- Edit
(pencil) – The Update Membership Account pane appears. See Step 2 below.
- Delete
(trash can) – The Delete pop-up appears, with buttons
to Delete or Cancel / X Close. If Delete is
selected, the Account will be deleted. If either of the other two
options are selected, the Account will remain.
- To create
a new Membership Plan click + Membership Plan at the upper-right
– or Edit an existing Membership Plan by clicking the
corresponding Edit (pencil) button of an existing Plan.
- The New/Update
Membership Account pane appears, with the following fields:
- Customer –
(Mandatory) Select a Customer from the dropdown list of all added
customers.
- Membership
Plan – (Mandatory) Select a Plan from the dropdown list of all added
plans.
- Card
Number – (Mandatory) Enter the Card Number
(letters and numbers allowed, cannot be more than 25 characters).
- Description
– Enter a description of the Membership Account, if necessary.
- Issue
Date – Select the Issue Date of the Account (calendar), which
will be enabled after selecting the Membership Plan.
- Expiry Date – The expiration Date will
auto-populate based on the selected Issue Date and the Allowance
Period of the selected Membership Plan.
- Balance
Amount – The Balance Amount will auto-populate
based on the selected Membership Plan, and cannot be edited.
- Add Members – (Mandatory) Select
one or more Members from the dropdown. The selected members cannot have
another Membership Account within the Store.
- When
finished creating (or updating) the Account, click Save (or Update).
- Save will be disabled by
default until both mandatory fields are filled in, while
- Update will be disabled until an update is made.
Related Articles
Retail Back Office: Customers - Membership
Navigation: Sign into the Back Office for your Retail Store, then select Customers > Membership. The Membership page appears, containing tabs for Type (default), Plan and Account. All 3 tabs will have some similar functionality. Type Plan Account ...Back Office: Membership Reports
Navigation: Log into the Back Office and select a Store. Select Report then Membership. The Membership report page contains the following tabs: Membership Summary and Membership Statement Membership Summary Membership Statement Membership Summary ...Back Office: Enterprise - Customers
Sign into the Back Office. On the left-side Navigation Panel, click Customers. Under Customers are options to access pages for Customers or Memberships: Customers Memberships Customers When selected, the existing Customers’ details will be shown as a ...Retail Back Office: Membership Reports
Navigation: Log into the Back Office for your Retail Store, then select Reports > Membership. The Membership report page contains the following tab options: Membership Summary Membership Statement Membership Summary Displays the details of a ...Retail Back Office: Dashboard - Customers
Navigation: Log into the BO for your Store, then on the Home page select Customers Select a Time Period from the dropdown, then click Apply. The following information will appear based on the selected Time Period. Tiles New Customer - Displays the ...