Back Office: Enterprise - Menu Configuration
- Sign
into the LingaPOS Back Office at mystore.lingapos.com.
- On the left-side Navigation Panel, click Enterprise.
Then click Menu Configuration.

- Menu
Configuration allows you to transfer data from one Store to other Stores to eliminate duplicate definition
of the same entity for different Stores - like Menu Items, Tax, Modifiers,
etc.
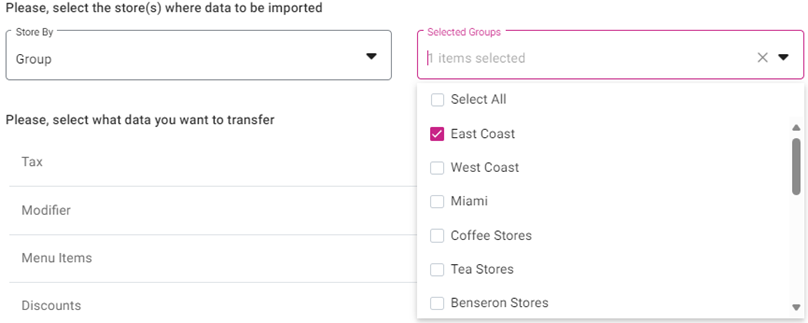
Select
the Type of Store (Restaurant or Retail).
Select the Store(s) where the data will
be imported to. The Store By dropdown is for narrowing your options
(like Group, State, City, Zip). The Selected [Store(s),
Group(s), etc.] dropdown is for making your selection based upon the Store
By selection.
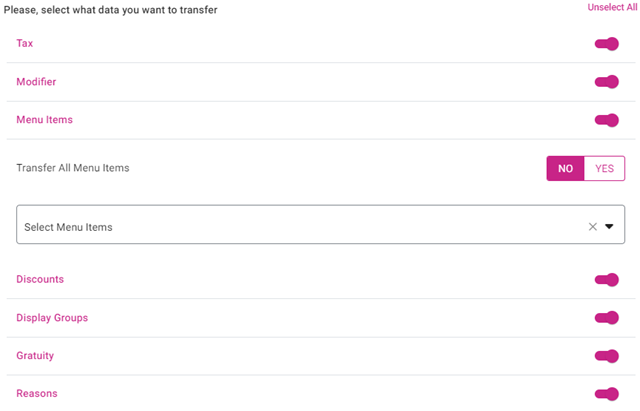
Select
the Data you want to transfer by sliding the corresponding toggle to the right
(On). Click Select All to slide all toggles on.
If Menu
Items is toggled on, select whether to Transfer All Menu Items. If No,
Select specific Menu Item(s) from the Select Menu Items dropdown.
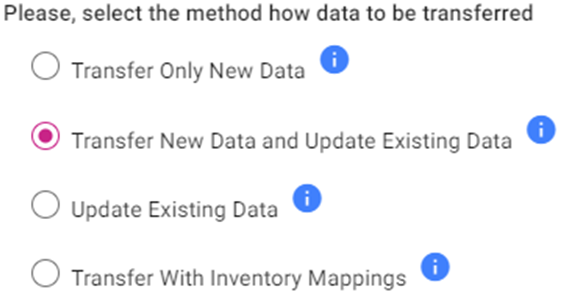
Select
the method of Data Transfer.
Transfer Only New Data – Transfers just the data that currently doesn’t
exist at the importing Store(s).
Transfer New Data and Update Existing Data – Transfers data that currently doesn’t exist at the
importing Store(s) and updates the values of any currently existing data as
needed.
Update Existing Data – Just updates the values of any currently existing data as needed.
Transfer With Inventory Mappings – A full transfer is conducted, including
inventory data.
When
ready to conduct the transfer, click Run at the top right. The Linga
logo with a spinning circle appears while the transfer is running. When the
Transfer is complete, the logo will disappear and the banner Data Transfer
operation is successfully completed appears at the top right.

Related Articles
Retail Back Office: Enterprise - Push/Pull Data
Navigation: Sign into the Back Office. On the left-side, select Enterprise. On the Enterprise page, select Central Inventory then Push/Pull Data. The Push/Pull Data screen appears, where data can be pulled from one Store/Central Inventory/Central ...
Back Office: Enterprise - Push/Pull Data
Sign into the Back Office. On the left-side Navigation Panel, click Enterprise. On the Enterprise page, click Central Inventory then select Push/Pull Data. The Push/Pull Data screen appears, where data can be pulled from one Store/Central ...
Retail Back Office: Enterprise - Item Configuration
Navigation: Sign into the Back Office. On the left-side Navigation Panel, click Enterprise. Then click Item Configuration. Item Configuration allows you to transfer data from one Store to other Stores to eliminate duplicate definition of the same ...
Back Office: Enterprise - Reports
Sign into the Back Office. On the left-side Navigation Panel, click Enterprise. Then click Enterprise Reports. Under Enterprise Reports are options to access specific reporting Dashboards: Enterprise Reports Sale Report The Sale Report dashboard ...
Back Office: Enterprise - Customers
Sign into the Back Office. On the left-side Navigation Panel, click Customers. Under Customers are options to access pages for Customers or Memberships: Customers Memberships Customers When selected, the existing Customers’ details will be shown as a ...