Back Office: Enterprise Settings - Account
Navigation: Sign
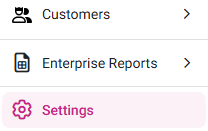
into the Back Office. On the left-side Navigation Panel, click Enterprise,
then click Settings.
Under the Enterprise Settings section:
Account Users
Additional users who would be granted access to all Stores and Enterprise settings.
- To create a new User on the Account, click + New Account User at the top-right. The New Account User page appears.
- To Edit an existing User, click the corresponding ••• followed by Edit. The Update Account User page appears.
- To Delete an existing User, click the ••• followed by Delete. The Delete pop-up appears. Click Delete to confirm.
- On the New / Update Account User screen:
General
- Enter the First and Last Names.
- Optional: Select the Gender from the dropdown, then the Date Of Birth (calendar).
- Enter the Phone Number (optional), then the Email Address.
- Select the Language from the dropdown, then select the Date Of Joining (optional).
- Optional: Add a Photo by clicking the Upload New Image button and selecting the photo.
Password
- Create a Password for the User, then re-enter it in Confirm Password.
- A Password must Include: between 6 and 12 characters, at least 1 uppercase and 1 lowercase character, 1 number, and 1 special character.
- Note: If you need to reset a User’s Password, click the corresponding ••• for the Account User, then click Reset Password. After entering the New Password and re-entering in Confirm Password, click Authenticate.
Store Access
- Select the Store(s) the User will have access to in the dropdown.
- Select whether the User should have a POS Login. If YES, enter their unique PIN Number (minimum 4 digits) and what will be their Initial Screen (the first screen they see upon logging in to the POS).
- For each Store: select whether the User will be Required to Clock In, then select the Roles they’ll be able to Clock In as from the dropdown.
Address
- Enter the Address: Line 1 (Address Number and Street), Apt, Suite, etc. (optional), City, State, andZip Code.
Enterprise Access
- Select whether to grant the User access to Central Kitchens and Central Warehouses. If Yes, then for each Kitchen/Warehouse slide the corresponding toggle to the right (on) to Allow Access. To select all the Kitchens/Warehouses, click Select All.
Customization
- If Yes, enter the Rename Sub Recipe and the Rename Prepare Sub Recipe.
Account Licenses
Store licenses for the respective account will be displayed along with option to reset the license.
You can view the statuses of each License on the Account, sorting by Node ID, Store, Device Type, Device Name, and timestamps for Login, Accessing, and Sync. You can sign out a device by clicking Sign Out.
Account License Settings
Store licenses on the Account can be configured for functionality.
Set the functionality of Licenses while logged in to each Store. There are toggles available for each type of functionality, with the maximum number of stores allowed for the functionality above. After updating toggle settings, click Save at the top-right.
Related Articles
Retail Back Office: Enterprise Settings - Account
Navigation: Sign into the Back Office. On the left-side Navigation Panel, click Enterprise, then click Settings. On the Settings page: under the Enterprise Settings section: Account Users – Additional users can be granted access to all Stores and ...Back Office: Enterprise Settings - Royalty Franchise
Sign into the Back Office. On the left-side Navigation Panel, click Enterprise, then click Settings. Under Royalty / Franchise: Royalty / Franchise A listing of all Stores with an Activate Royalty toggle. To Activate the Royalty of a Store, click the ...Retail Back Office: Enterprise Settings - Royalty Franchise
Navigation: Sign into the Back Office. On the left-side Navigation Panel, click Enterprise, then click Settings. The Royalty / Franchise section displays the following options Royalty/Franchise The page displays a table with a listing of all Stores ...Back Office: Enterprise - Reports
Sign into the Back Office. On the left-side Navigation Panel, click Enterprise. Then click Enterprise Reports. Under Enterprise Reports are options to access specific reporting Dashboards: Enterprise Reports Sale Report The Sale Report dashboard ...Back Office: Enterprise - Customers
Sign into the Back Office. On the left-side Navigation Panel, click Customers. Under Customers are options to access pages for Customers or Memberships: Customers Memberships Customers When selected, the existing Customers’ details will be shown as a ...