Back Office: Enterprise - Transfer Request
Sign
into the Back Office.
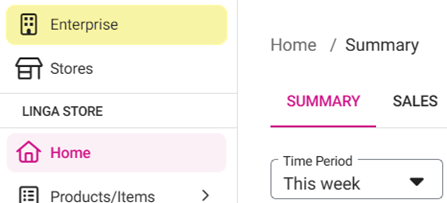
On
the left-side Navigation Panel, click Enterprise. On the Enterprise
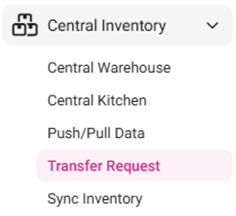
page, click Central Inventory then select Transfer Request.
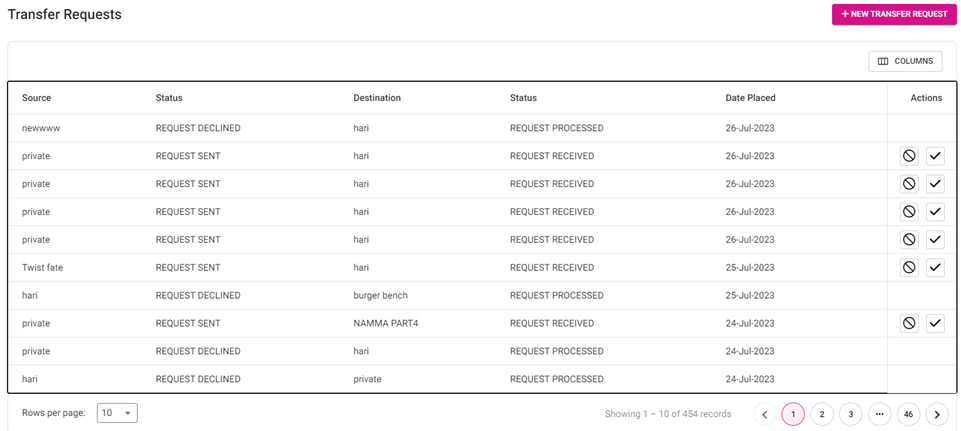
The Transfer Requests
page contains a table of Inventory Items transferred from one store to another,
with options for Columns and Pagination.
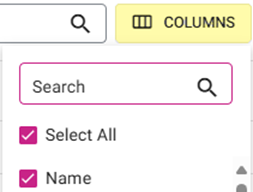
Columns –
Select
the button to display a dropdown to select/deselect the table’s columns to
view. Select the corresponding checkbox to view the column - or deselect to
hide it. The Select All box (default) selects and displays all columns.
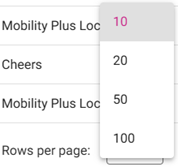
Pagination
(records organized by 10 per page, with options for 20, 50
and 100).
The Transfer Requests table
contains the following columns:
Source – The name of the Store from which the item was transferred. The source name will be which user has been logged by default. The original store from which the items have been sent will be shown into this column.
Destination – The store to which the inventory item was transferred.
Status – The Status of the transfer request (Request Completed, Request Processed, or Request Sent).
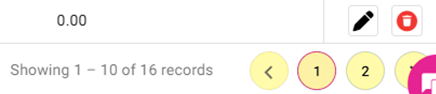
Date Placed – The Date the transfer request was placed (DD-MMM-YYYY).
Actions – Two icons options are shown:
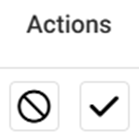
Circle with diagonal line (X) – Reject the corresponding Transfer
Request.
Checkmark
(P)
– Approve the Transfer Request, to be completed.
Click the + New Transfer
Request button at the top right to create a new Transfer Request. The New
Transfer Request pane appears.
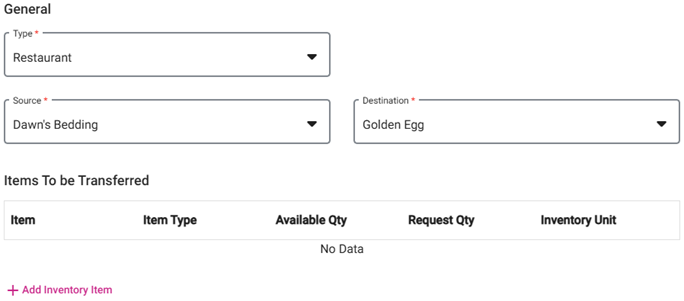
Type
– Select Restaurant or Retail
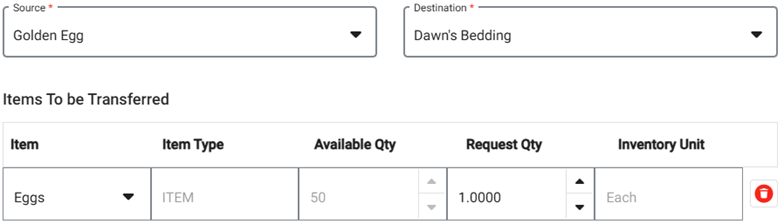
Source
– Select the Source store from which the inventory
item can be transferred. A dropdown will be shown, the store can be selected
& Only one store can be selected. Upon selecting a Source, the add
inventory field will be activated.
Destination
–
Select the Destination store to which the Transfer
Request is being made and will be the logged-in Store by default.
+ Add Inventory Item –
A new Inventory Item row appears with the following fields (you cannot
add an Inventory Item unless the Destination is selected).
Item
– Select an item from the inventory of the Source store.
Item
Type – Will auto-populate based on the Item selection (cannot be
edited).
Available
Qty – Will auto-populate based on the Item selection (cannot be
edited).
Request
Qty – Enter the number of items requested to be transferred (type the value
or click ▲/▼ to increase/decrease the value – a maximum of 4 decimal places).
Inventory
Unit
– The unit set in the inventory item will be shown here by default.
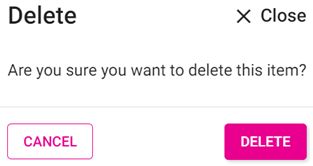
Click Delete (trash
can icon) to remove an Inventory Item from the Transfer Request. The
Delete confirmation pop-up appears with Cancel and Delete
options. Select Delete to confirm removing the Item from the Request,
with the ‘Inventory Item deleted successfully’ message appearing.
Select Cancel to keep the Item on the Request. Upon clicking Cancel, the
pop-up will be closed.
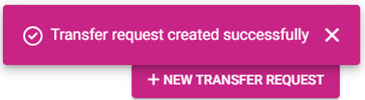
Once satisfied with everything in the request, click Request to finalize and submit the Request. You are returned to the main Transfer Requests screen, where the ‘Transfer request created successfully’ confirmation pop-up appears at the upper-right.
Click Cancel to cancel
creation of the Request and return to the main screen.
The existing request
appears in the table with a Status of Request Received.

Related Articles
Retail Back Office: Enterprise - Transfer Request
Navigation: Sign into the Back Office. On the left-side Navigation Panel, click Enterprise. On the Enterprise page, click Central Inventory then select Transfer Request. The Transfer Requests page contains a table of Inventory Items transferred from ...
Back Office: Inventory - Transfer Request
Navigation: Sign into the Back Office and select a Store. On the left-side, select Inventory then Transfer (bottom of dropdown). The Transfer Requests page appears, with tabs for Transfer Requests (default) and Transfer Logs. Transfers are used to ...
Retail Back Office: Inventory - Transfer Request
Navigation: Sign into the Back Office for your Retail Store, then select Inventory > Transfer. The Transfer Requests page appears, with tabs for Transfer Requests and Transfer Logs. Transfers are used to Send/Receive Orders from one Store to another ...
Back Office: Enterprise - Menu Configuration
Sign into the LingaPOS Back Office at mystore.lingapos.com. On the left-side Navigation Panel, click Enterprise. Then click Menu Configuration. Menu Configuration allows you to transfer data from one Store to other Stores to eliminate duplicate ...
Back Office: Enterprise Settings - Addons
Sign into the Back Office. On the left-side Navigation Panel, click Enterprise. Then click Settings. On the Settings page, under Addons: Loyalty Loyalty Settings Select whether to Enable Loyalty. If Yes: Select the Loyalty Currency (Stars ...