Back Office: Inventory - Category
Navigation: Sign
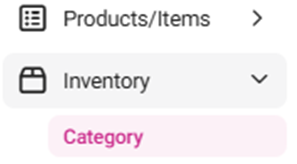
into the Back Office. On the left-side Navigation Panel, click Inventory
then Category.
The
Category page appears, including the Total Value on Hand, along
with a table containing the following columns:

- Name – Displays the category’s name.
- Description – Displays description of the category.
- Value On Hand – Displays the available amount of stock.
- Actions – Buttons for Edit (pencil) and Delete (trash can).
- Delete – The Delete pop-up including the message ‘Are you sure you want to delete this item’ appears, with Cancel and Delete options.
- Select Delete and the Category is sent to Inactive status with a ‘Category inactivated successfully’ confirmation message appearing.
- Select Cancel, and the Category is kept in Active status.
Create or Update a Category
- Click the + New Category button at the upper-right (or under the Actions column click the corresponding Edit [pencil] of an existing Category).
- On the New/Update Category pane that appears, enter the following fields:
- Name – (Mandatory) Enter the name of the category (maximum of 25 characters).
- Code – Enter the code for the category (numbers and letters allowed, no maximum).
- Description – Enter details about the category (numbers and letters allowed, no maximum).
- When ready, select Save or Update at the bottom-right. You’re returned to the Category page, and a confirmation message appears at the upper-right. If a new Category was created, it will be added as a row in the table.
- The Save / Update button is disabled by default - and will be enabled only after filling in all mandatory fields (and when updating a Category, editing an existing field).
- Click Cancel / Close to close the pane without creating or updating the Category.
Delete (Deactivate) a Category
- Identify the Category to be deleted, then under the Actions column click the trash can button.
- On the Delete pop-up that appears, select Delete to confirm deleting Category.
- To keep the Category as Active, click X Close or Cancel.
- You're returned to the main Category page, where the confirmation banner appears at the upper-right and the Category will be removed as a row in the table (deactivated).
Related Articles
Retail Back Office: Inventory - Category
Navigation: Sign into the Back Office for your Retail Store, then select Inventory > Category The Category page appears, including the Total Value on Hand, along with a table containing the existing Categories containing with the following columns: ...Back Office: Inventory - Sub Category
Navigation: Sign into the Back Office and select a Store. On the left-side, select Inventory then Subcategory. The Subcategory page appears, including the Total Value on Hand, along with a table containing the following columns: Name – Displays the ...Retail Back Office: Inventory - Sub Category
Navigation: Sign into the Back Office for your Retail Store, then select Inventory > Subcategory The Sub Category page appears, including the Total Value on Hand, along with a table containing the following columns: Name – Displays the subcategory’s ...Back Office: Inventory - Inventory Item
Navigation: Sign into the Back Office. On the left-side, select Inventory then Inventory Item. The Inventory Item page appears, with tabs for Inventory Items and Retail Items – along with a Select Categories dropdown and a Total Value On Hand. Tip: ...Back Office: Inventory - Modifiers
Navigation: Sign into the Back Office. On the left-side, select Inventory then Inventory Modifiers. The Inventory Modifiers page appears, which contains a table of existing Modifiers. This is where you link Modifiers to Inventory Items, Sub Recipes ...