Back Office: Inventory - Preparation
Navigation: Sign
into the Back Office for your Store. On the left-side, select Inventory
then Preparation.
The
Preparation page appears. Select Prepare Menu Item or Prepare
Sub Recipe.
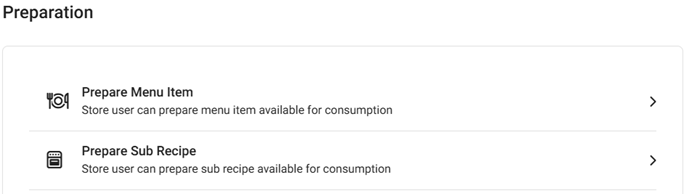
Prepare Menu Item
The page displays a history of Menu Items offered by the Store, with tabs for Production (default) and Production Log. This will allow you to prepare Menu Items or Sub Recipes in advance.
- Example: you can make 10 or 20 donuts in advance and sell them later on. Once you sell out, you can prepare the new Menu Item (donut) again and sell it later. Same with Sub Recipe. You must prepare the Sub Recipe first, then the system will deduct the Quantity of Sub Recipe from its available Quantity on hand.
Production
Production Log
Production
Displays a table of Menu Items currently available to be produced, containing the following columns:
- Name – The name of the inventory menu.
- Price – The price of inventory menu item along with its serving size.
- Production On Hand – The number of menu items prepared in quantity.
- Action – Contains the following buttons:
- Add (plus
icon) – Click to add more of the Menu Item to be produced. The Produce Menu Item pane appears, where you can Search by PLU Code.
- Select the Serving Size and Quantity To Prepare (the Menu Item and Production on Hand are not editable as they’re corresponding to the item).
- The corresponding values under Inventory Items / Sub Recipes / Manual Entry will be updated accordingly, along with the Total values at the bottom of the pane.
- When ready, click Save at the bottom-right. You are returned to the Production tab of the Prepare Menu Item screen where the item’s corresponding Price and Production On Hand have been updated.
- Note: Save will be greyed out until all mandatory fields have been filled in.
- Select X Close / Cancel to return to the Production tab without adding a Menu Item.
- Note: if you select + Produce Menu Item, you will be able to select the Menu Item and Serving Size from the dropdown, as there won’t initially be a corresponding item.
- See History
(Clock with arrow circling counter-clockwise)– Displays the Production History of the Menu Item in the form of a table containing the following columns:
- Name – The name of the inventory item.
- Production Date – The date the Menu Item was created.
- Inventory Count – The count of inventory for the item.
- Quantity – The quantity entered while creating the menu item.
- Latest Unit Price – Cost price of the menu item (set in the Inventory Menu Item).
- Action – Contains a button to See History to view the Preparation History.
Production Log
Displays a table containing a produced inventory history of all Menu Items at the Store.
Select a Consumption Status and Time Period, then click Apply. The table containing the following columns will be populated:
- Name - The name of the inventory item
- Created Date - The date the Menu Item was created
- Inventory Count - The amount of inventory available for the item
- Received Quantity - The entered Quantity while creating the Menu Item
- Price - The price of the inventory item.
Prepare Sub Recipe
Displays a history of Sub Recipes for the Store in the form of a table containing the following columns:
- Name – The name of the sub recipe.
- Price – The price value of the sub recipe.
- Quantity On Hand – The available quantity of the inventory item.
- Actions – Contains a button to Add (plus [+] sign) the preparation of the corresponding Sub Recipe.
Prepare a New Sub Recipe
- Select Add (+) on a corresponding Sub Recipe. The Prepare Sub Recipe pane appears. All fields will be pre-populated but can be updated.
- Note: if you select + Prepare Sub Recipe at the top, the same pane will appear but won’t have any pre-populated fields as the button doesn’t correspond to a specific sub recipe.
- You can keep the Sub Recipe as is or select a different one if needed.
- For the desired Quantity - use ▲/▼ or manually enter the value) as needed.
- You can update the Primary and/or Secondary Storage, if needed.
- When ready, click Save at the bottom-right. You are returned to the Prepare Sub Recipe page where the item’s updates have been reflected, and the ‘Sub recipe prepared successfully’ confirmation banner appears at the upper-right.
- Note: Save will be greyed out until all mandatory fields have been filled in.
- Select X Close / Cancel to return to the Prepare Sub Recipe page without updating.
Related Articles
Back Office: Inventory Reports
Navigation: Log into the Back Office and select a Store. On the left side, select Reports > Inventory Reports. On the Inventory Reports dashboard, select a tab: Master Stock Purchased Item Consumption Log Compare Inventory Count Sheet COGS Adjust ...Back Office: Inventory - Sub Recipe
Navigation: Sign into the Back Office and select a Store. On the left-side, select Inventory then Sub Recipe. The Sub Recipe page appears, which displays a table containing a list of Sub Recipes that have already been created. If you are preparing a ...Reatil Back Office: Inventory Reports
Navigation: Log into the Back Office for your Retail Store, then select Reports > Inventory Reports. The Inventory Reports page is organized into multiple tabs: Master Stock Purchased Item Consumption Log Compare Inventory Count Sheet COGS Adjust ...Back Office: Home
Navigation: Sign into the Back Office. then select a Store. You should be taken to that store’s Home page. If not, then on the left side navigation, click Home. Tip: Type the name of the Store in the Search bar for quicker Store selection. For every ...Back Office: Products/Items - Products/Items
Navigation: Sign into the Back Office for your Store. On the left-side, select Products/Items then Products/Items. The Products/Items page displays all established Menu Items or Retail Items under the Store. Create or Update an Item To create a new ...