Back Office: Inventory - Transfer Request
Navigation: Sign
into the Back Office and select a Store. On the left-side, select Inventory
then Transfer (bottom of dropdown).
The
Transfer Requests page appears, with tabs for Transfer Requests (default) and Transfer Logs. Transfers are used to Send and Receive Orders between Stores that are under the same Enterprise Account.
- Please Note: Transfers will work only if both Stores have the same Menu AND Inventory Items. The Menu/Inventory backend must also be the same, which means the Menu/Inventory must be copied using the Menu Config tool from one Store to another in the beginning while setting up the Menu/Inventory for the Store.
Transfer Requests
Transfer Logs
Transfer Requests
Displays the history of Transfer Requests sent from the Store, in the form of a table containing the following columns:
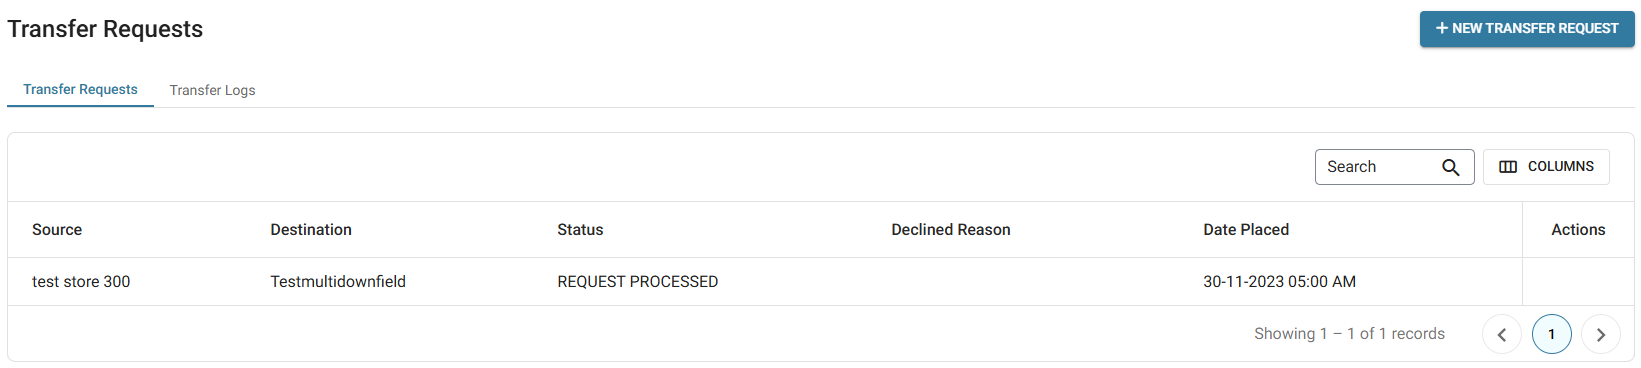
- Source – The name of the store from which the item has been transferred.
- Destination – The store to which the inventory item has been transferred.
- Status – The request’s status, including Completed, Processed, Sent, or Declined.
- Date Placed – The date [DD-MM-YYYY HH:MM AM/PM] the request was placed.
- Action – Options to Approve (Checkmark) which completes the Request, or Reject (Circle with diagonal line) which deletes the Request.
New Transfer Request
- Click the + New Transfer Request button at the upper right. On the New Transfer Request pane that appears:
- Destination – Will be greyed out and appear as the current Store in Back Office.
- Source – From which Store the inventory item(s) are to be transferred. Only one store can be selected. Upon selecting a source, the + Add Inventory Item button will appear below on the left-side of the pane.
- Items To be Transferred – The table contains columns with values that correspond to the added Item: Item Type, Available Qty (Quantity), Request Qty (Quantity) and Inventory Unit.
- Select + Add Inventory Item to add a new item row to the table that represents an Item added to the Transfer Request. Select an Item from the dropdown, then enter the amount of Request Qty (up to 4 decimal places). All other values are greyed out based on what was assigned for the Item and cannot be edited.
- To delete an item: select the corresponding Delete (trash can icon) at the end of its row. The Delete pop-up appears with the message ‘Are you sure…?’ with Cancel and Delete options. Select Delete to confirm deleting the Request or Cancel to keep it.
- When all needed items have been added to the Request, click Request at the bottom-right to submit the Request.
- Once submitted, the Transfer Request for the inventory item(s) will be completed. You're returned to the Transfer Requests tab, where confirmation pop-up appears at the upper-right and the Request is added as a row in the table. Once it is requested, the Source Store will receive the Request under their Transfers.
- The Source Store has 2 options to Accept or Reject the Request. If they Accept it, the requested Item Quantity will be deducted from the Source Store and the system will add the Quantity to the Destination Store.
Transfer Logs
Displays a Store's history of transferred Menu Items and Sub Recipes:
- Type – Select All, Inventory Item or Sub Recipe. Additional dropdowns may appear based upon the selection.
- Inventory Item – Select from the Category and Inventory dropdowns that appear.
- Sub Recipe – Select from the Sub Recipe dropdown that appears.
- Transfer Status – Select Received or Transferred.
- Time Period – Select an option from the dropdown.
- When all needed dropdown selections have been made, click Apply. The below table containing the following columns is populated (if no data is available based on your selection, the message 'Transfer Logs not found' appears in the body of the table):
- Source – The store from which the inventory item was transferred
- Destination – The store to which the inventory item was transferred
- Item Name – The item which was transferred from the Source to the Destination
- Item Type – The Inventory Item or Sub Recipe type
- Unit – The unit of measurement for the Inventory Item
- Received Quantity – The Quantity set in the transfer request for the respective item
- Date Processed – The date the transfer was completed [DD-MM-YYYY HH:MM AM/PM format]
Related Articles
Retail Back Office: Inventory - Transfer Request
Navigation: Sign into the Back Office for your Retail Store, then select Inventory > Transfer. The Transfer Requests page appears, with tabs for Transfer Requests and Transfer Logs. Transfers are used to Send/Receive Orders from one Store to another ...Back Office: Enterprise - Transfer Request
Sign into the Back Office. On the left-side Navigation Panel, click Enterprise. On the Enterprise page, click Central Inventory then select Transfer Request. The Transfer Requests page contains a table of Inventory Items transferred from one store to ...Retail Back Office: Enterprise - Transfer Request
Navigation: Sign into the Back Office. On the left-side Navigation Panel, click Enterprise. On the Enterprise page, click Central Inventory then select Transfer Request. The Transfer Requests page contains a table of Inventory Items transferred from ...Back Office: Inventory Reports
Navigation: Log into the Back Office and select a Store. On the left side, select Reports > Inventory Reports. On the Inventory Reports dashboard, select a tab: Master Stock Purchased Item Consumption Log Compare Inventory Count Sheet COGS Adjust ...Reatil Back Office: Inventory Reports
Navigation: Log into the Back Office for your Retail Store, then select Reports > Inventory Reports. The Inventory Reports page is organized into multiple tabs: Master Stock Purchased Item Consumption Log Compare Inventory Count Sheet COGS Adjust ...