Back Office: KDS Configuration Template Settings
Navigation: Sign
into the Back Office for your Store. On
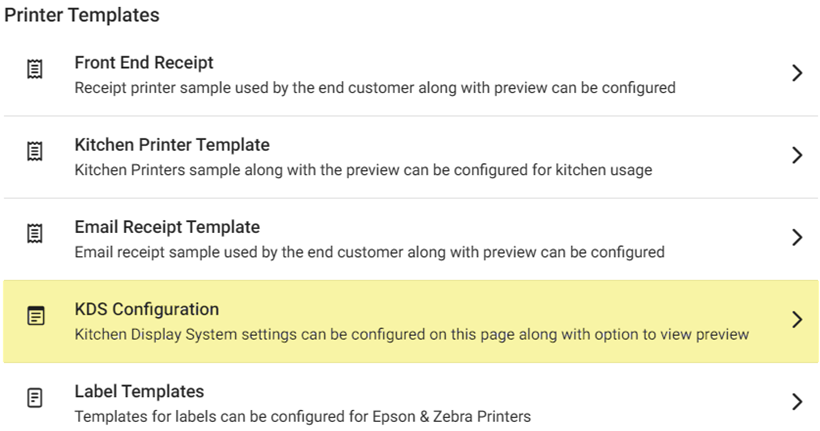
the left side, select Settings. On the Settings page, under Printer Templates select KDS Configuration.
The KDS Configuration screen contains sections for Field Options, Style Options,
and SMS Order Notifications – along with a KDS
Ticket Preview.

Field Options
- For any checkbox fields: If the box is enabled (selected with pink box and white checkmark), the name will be shown on the Preview and the template. If disabled (not selected), it will not be shown on both.
- Table Name – The Name/Number of the Table (per Back Office settings).
- Check Number – The auto-generated Number of the Check.
- Time – The Time the Order was placed.
- Server Name – The Name of the Server assigned to the Table and Order.
- Service Type – The Type of Service provided for the Order (such as Table Service).
- Seat Number – The Name/Number of the Seat at the assigned Table.
- Notes – Any entered Notes (edits to Menu Items on the Order) will appear on the ticket and receipt.
- KDS Done Button – If Enabled, KDS can't store item-based prep time. If disabled, KDS can store it.
- Horizontal View for Modifier – If Enabled, the user can view the Modifiers in horizontal view along with the quantity and in KDS. If disabled, the user cannot view the modifier and quantity in horizontal view - and in KDS.
- Disable KDS Broadcast – If Enabled, the selected KDS devices will not be able to communicate with each other. If disabled, they will be able to.
Style Options
- Modifier Colors - Red is the default color. When the colorized square is clicked, the following colors are shown: Wisteria (purple), Turquoise, Sunflower (yellow), Alizarin (red), Emerald (green), Peter River (blue), and Orange. Upon selecting the color, the template will change accordingly.
- Addon Colors - Yellow is the default color. When the colorized square is clicked, the same colors as for Modifier are shown. Upon selecting the color, the template will change accordingly.
- Status 1 Field - Blue is the default Status 1 Color. When the colorized square is clicked, the same colors as for Modifier are shown. Upon selecting the color, the template will change accordingly. The After Mins is displayed where the customer can enter the number of minutes or use the up ▲ or down ▼ arrows to increase/decrease the number of minutes by 1.
- Status 2 Field - Yellow is the default Status 2 Color. When the colorized square is clicked, the same colors as for Modifier are shown. Upon selecting the color, the template will change accordingly. The After Mins is displayed where the customer can enter the number of minutes or use the up ▲ or down ▼ arrows to increase/decrease the number of minutes by 1.
- Status 3 Field - Green is the default Status 3 Color. When the colorized square is clicked, the same colors as for Modifier are shown. Upon selecting the color, the template will change accordingly. The After Mins is displayed where the customer can enter the number of minutes or use the up ▲ or down ▼ arrows to increase/decrease the number of minutes by 1.
SMS Order Notifications
- The following text is shown below the header: To send a text message to a guest, a server or both when an order is complete, check the boxes below. To customize the message you can use $ORDER for order number. $RESTAURANT for restaurant name. $TABLE for table number.
Note: The following settings are only available to users with an SMS texting license. - Customer Arrived Notification - If Enabled (YES), KDS will receive a ‘customer is arrived’ notification for Curbside and Pickup orders. If Disabled (NO), the notification will not be sent.
- Completed Order: QSR - If Enabled (YES), a guest will receive an SMS text notification when their Quick Service Order (QSR) is completed. In the Message field, enter the message to be sent for the notification. If Disabled (NO), the notification will not be sent.
- Completed Order: Table Service - If Enabled (YES), a guest will receive an SMS text notification when their Table Service order is completed. In the Message field, enter the message to be sent for the notification. If Disabled (NO), no notification will be sent.
- Complete Order: Online Order - If Enabled (YES), a guest will receive an SMS text notification when their Online order is completed. In the Message field, enter the message to be sent for the notification. If Disabled (NO), no notification will be sent.
- Complete Order: Delivery Order - If Enabled (YES), a guest will receive an SMS text notification when their Delivery order is completed. In the Message field, enter the message to be sent for the notification. If Disabled (NO), no notification will be sent.
- Completed Order: To Go Order - If Enabled (YES), a guest will receive an SMS text notification when their To Go order is completed. In the Message field, enter the message to be sent for the Delivery Order notification. If Disabled (NO), no notification will be sent.
- Complete Order: For Here Order - If Enabled (YES), a guest will receive an SMS text notification when their For Here order is completed. In the Message field, enter the message to be sent for the Delivery Order notification. If Disabled (NO), no notification will be sent.
- Completed Order: Bar Tab Order - If Enabled (YES), a guest will receive an SMS text notification when their Bar Tab order is completed. In the Message field, enter the message to be sent for the Delivery Order notification. If Disabled (NO), no notification will be sent.
After making
all desired changes, click SAVE or UPDATE to apply the KDS Configuration changes.
Related Articles
Back Office: Label Template Settings
Navigation: Sign into the Back Office and select a Store. On the left side, select Settings. On the Settings page, under Printer Templates select Label Templates. The Label Template screen contains template options as tabs, along with a Template ...Back Office: Kitchen Printer Receipt Template Settings
Navigation: Sign into the Back Office for your Store. On the left side, click Settings. On the Settings page, under Printer Templates click Kitchen Printer Templates. The Kitchen Printer Template page contains multiple Template customization options, ...Back Office: Front End Receipt Template Settings
Navigation: Sign into the Back Office for your Store. On the left side, select Settings. On the Settings page, under Printer Templates select Front End Receipt. The Front End Receipt page is broken down into sections along with a Template Preview. ...Back Office: Email Receipt Template Settings
Configure what you would like to include on the Email Receipt Navigation: In the Back Office, on the left-side click Settings. On the Settings page, under Printer Templates select Email Receipt Template. The Email Receipt Template page contains ...Retail Back Office: Label Template Settings
Navigation: Log into the Back Office for your Retail Store. On the left-side Navigation Panel, click Settings. On the Settings page, under Printer Templates, select Label Templates. The Label Template screen allows you to customize what prints on ...