Back Office: Products/Items - Modifiers
Navigation: Sign
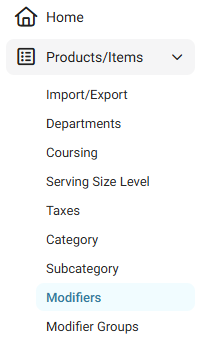
into the Back Office. On
the left-side, select Products/Items then Modifiers.
The Modifiers page displays all established Modifiers under the Store.
Create or Update a Modifier
- Create a new Modifier by clicking + New Modifier at the upper-right, or update an existing Modifier by clicking the corresponding
pencil button under the Actions column. The New/Update Modifier page appears.
(1) Basic Details
General
- POS Display Button - Click the small colorized square (next to the larger colorized square). Select the color by using the 2 sliders to select the new color for the POS Display Button.
- Enter the Name (mandatory). The name will appear on the POS Display Button.
- Enter any Secondary Name and the PLU Code (if applicable).
- Enter the Maximum No of Times (mandatory) and any product to Modify With.
- Enter any Short Form for the modifier.
Tax
- Slide the Inherit Default Tax Settings to the right (ON) to apply the Store's default tax setup to the Modifier, or select the individual Taxes by clicking them.
- Create a new Tax by clicking + New Tax. On the New Tax pane:
- Enter the Name of the Tax.
- Select the Tax Type - whether a value in Amount or Percentage will be added to a transaction.
- If for a Percentage, select if it’s a Default Tax and/or an Inclusive Tax.
- Click Save when the new Tax is set.
Visibility
- Select whether you’d like to Show the Modifier in the POS.
- Select whether you’d like to Show the Menu Item In the Print version of the Modifier.
- Select whether you’d like to Show the Modifier in the Print version of the Menu.
Kitchen Printers
- Select from the existing Kitchen Printer(s).
- Also, you can add a new Kitchen Printer by clicking + New Kitchen Printer. For more information, see the Kitchen Printer article.
(2) Prefixes and Serving Size Levels
Prefixes
- Update an existing Prefix by clicking in the Prefix Name or Price Field and entering the new value, or toggling the Override Modifier Price Off/On.
- To add a new Prefix, click + Add Prefix (which adds a new row to enter another Prefix Name and Price, and toggle for Override Modifier Price.
- To delete an existing Prefix, click the Trash Can icon to its right.
Serving Sizes
- Set whether you’d like to Set the Price of serving sizes.
- To add a new Serving Size, click + Add Serving Size Level, then select from the dropdown. If it’s a long list, you can use the Search bar to find your selection more quickly.
- For each Serving Size, enter a Price for the Serving Size and each Prefix.
- To delete an existing Serving Size, click the corresponding Trash Can button to its right.
(3) Proceed to Inventory Mapping
- When selected, the Confirm pop-up appears. Select Save and Proceed to confirm.
- To continue customizing the Modifier, select X Close or Cancel.
- After a moment to process the request (including a loading animation), the confirmation banner appears at the upper-right.
- Click the left-facing arrow at the upper-left to return to the main Modifiers page.
- If a new Modifier was created, it will be added as a row in the table.
Delete a Modifier
- Identify the Modifier to delete, then under the Actions column click the corresponding trash can button.
- On the Delete pop-up that appears, select Delete to confirm deleting (deactivating) the Modifier.
- To keep the Modifier as Active, click Cancel or X Close.
Related Articles
Back Office: Products/Items - Products/Items
Navigation: Sign into the Back Office for your Store. On the left-side, select Products/Items then Products/Items. The Products/Items page displays all established Menu Items or Retail Items under the Store. Create or Update an Item To create a new ...Back Office: Products/Items - Upcharges
Navigation: Sign into the Back Office then select a Store. On the left-side, click Products/Items then Upcharges. The Upcharges page appears. It contains a table of existing Upcharges, along with functionality for Active, Search, Columns, and ...Back Office: Products/Items - Modifier Groups
Navigation: Sign into the Back Office for your Store. On the left-side, select Products/Items then Modifier Groups. The Modifier Groups screen appears. Modifier Group Table If a Modifier Group was imported, it will be automatically populated in the ...Back Office: Products/Items - Discounts (Open Item)
Sign into the Back Office. On the left-side Navigation Panel, click Products/Items then click Discounts. Open Item Discount On the Discounts page, select the Open Item tab. On the Open Item page, click Edit. Tip: You can Activate or Deactivate the ...Back Office: Products/Items - Discounts (Item-Based)
Sign into the Back Office and select a Store. On the left-side Navigation Panel, click Products/Items then click Discounts. Create an Item Based Discount On the Discounts page, select the Item Based tab (default selection), then click + New Discount. ...