Back Office: Products/Items - Sort Menu Config
Navigation: Sign
into the Back Office for your Store. On
the left-side, select Products/Items then Sort Menu
Config.
The
Sort Menu Config screen appears, which displays the list of all Menu
Items, along with Categories, Sub Categories, Display Groups, and Menu
Items – with a Save button at the upper-right.
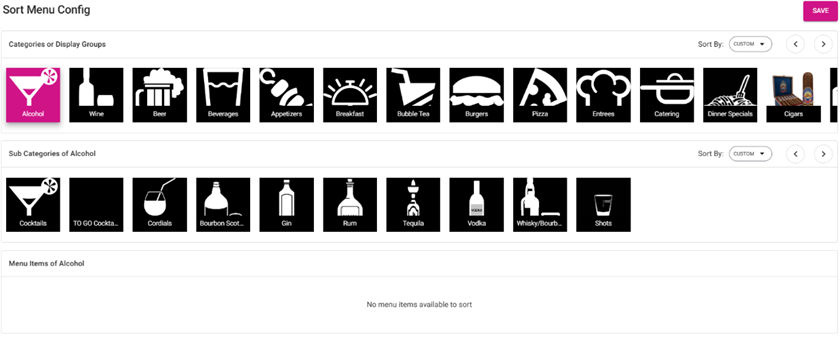
- Categories or Display Groups - The list of all the saved Categories or Displayed Groups - with a Sort By dropdown and < Left and Right > arrows for navigation.
- Sort By Dropdown – Available for Categories, Sub Categories or Display Groups. The options are Alphabetically (A-Z or Z-A), or Custom (you can drag-and-drop the list’s tiles into whatever order you’d like).
- Right Arrow (>) - When clicked, you proceed to the right on the list of tiles.
- Left Arrow (<) - When clicked, you proceed to the left on the list of tiles.
- Sub-Categories – If a Category is connected to a Sub Category, the Sub Category attached to the selected Category (highlighted in pink) will be displayed.
- Sort By is available for Sub Categories.
- Menu Items – If clicking a particular Sub Category under a Category, the list of Menu Items under the Sub Category will appear.
- If a Sub Category isn’t connected to a Category, the list of Menu Items is displayed directly under the Category.
- Sort By is available for Menu Items.
Once
you’ve performed all your needed sorting, click Save. Your sort
settings will be saved, and the confirmation message ‘Items sorted
successfully’ appears.
Related Articles
Retail Back Office: Products/Items - Sort Item Config
Navigation: Log into the Back Office for your Store, then select Products/Items > Sort Item Config The Sort Item Config page displays all offerings under the Store, broken down by Categories or Display Groups, then Subcategories and Items. When a ...Back Office: Products/Items - Products/Items
Navigation: Sign into the Back Office for your Store. On the left-side, select Products/Items then Products/Items. The Products/Items page displays all established Menu Items or Retail Items under the Store. Create or Update an Item To create a new ...Back Office: Products/Items - Upcharges
Navigation: Sign into the Back Office then select a Store. On the left-side, click Products/Items then Upcharges. The Upcharges page appears. It contains a table of existing Upcharges, along with functionality for Active, Search, Columns, and ...Back Office: Products/Items - Modifiers
Navigation: Sign into the Back Office. On the left-side, select Products/Items then Modifiers. The Modifiers page displays all established Modifiers under the Store. Create or Update a Modifier Create a new Modifier by clicking + New Modifier at the ...Back Office: Products/Items - Subcategory
Navigation: Sign into the Back Office. On the left-side, select Products/Items then Subcategory. The Subcategories page appears, which displays the Store's Subcategories in table format. Select a Category from the dropdown then click Apply. The ...