Back Office: Store Notifications Settings
Navigation: Sign
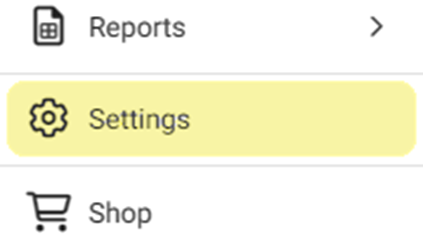
into the Back Office and select
a Store. On
the left-side Navigation Panel, click Settings. On the Settings page, under Store select Notifications.

- On the Notifications screen: there is a YES/NO toggle for the following options:
- Discount: If Enabled (YES), enter the discount amount in the Discount Limit field (numeric values only), and the Notify By option will appear with two checkboxes Text & Email.
- Void: If Enabled (YES), enter the Void amount in the Void Limit field (numeric values only), and the Notify By option will appear with two checkboxes Text & Email.
- Max No Cash Drawer Accessed For No Sale: If Enabled (YES), enter the limit amount in the Limit field (numeric values only), and the Notify By option will appear with the Text & Email checkboxes.
- Time Clock: If Enabled (YES), the Time Clock notification will be sent to the registered Email / Number. The Notify By option will appear with the Text & Email checkboxes.
- Daily KPI: If Enabled (YES), the KPI notification will be sent to the registered Email/Number. The Notify By option will appear with the Text & Email checkboxes.
- End Of the Day Alert: If Enabled (YES), the End Of the Day Alert notification will be sent to registered Email/Number. The Notify By option will appear with the Text & Email checkboxes.
- Wait List: If Enabled (YES), enter the message to send to the registered Number in the Custom Text field. The Notify By option will appear with the Text checkbox.
- Sale Recap Report: If Enabled (YES), the Sale Recap Report will be sent to the registered Email. The Notify By option will appear with the Email checkbox.
- One Page PDF: If Enabled (YES), the One page PDF will be sent to the registered email. The Notify By option will appear with the Email checkbox.
- Offline Payment: If Enabled (YES), when a check fails an email notification will be sent to registered email. The Notify By option will appear with the Email checkbox.
- Save – when all updates have been made, click SAVE at the upper-right. The 'Notification Settings Saved Successfully' banner appears and the Save button becomes greyed-out, confirming that the updates were applied.
Related Articles
Retail Back Office: Store Notifications Settings
Navigation: Sign into the Back Office for your Retail Store. On the left-side Navigation Panel, click Settings. On the Settings page, under Store click Notifications. On the Notifications screen: there is a YES/NO toggle for the following options: ...Retail Back Office: Store Inventory Settings
Navigation: Sign into the Back Office for your Retail Store. Click Settings, then on the Settings page under Inventory select Store Inventory. The Store Inventory screen displays settings for the store's inventory tracking and notifications. At the ...Back Office: Delivery Application Settings
Navigation: Sign into the Back Office and select a Store. On the left-side, click Settings. On the Settings page, under Application click Delivery. Settings Delivery Zones Driver Settings Enter the cost of the Delivery Charge (in local currency). ...Back Office: Kitchen Printer Hardware Settings
Navigation: Sign into the Back Office for your store. On the left-side, click Settings. On the Settings page, under Hardware select Kitchen Printers. The Kitchen Printers page appears. The Kitchen Printers settings page is broken down by the Printers ...Back Office: KDS Configuration Template Settings
Navigation: Sign into the Back Office for your Store. On the left side, select Settings. On the Settings page, under Printer Templates select KDS Configuration. The KDS Configuration screen contains sections for Field Options, Style Options, and SMS ...