Back Office: Store Payment Settings
Navigation: Sign
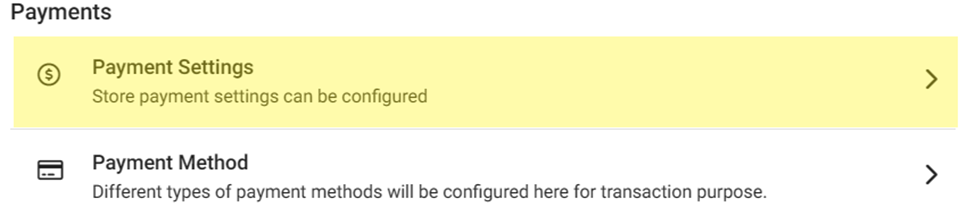
into the Back Office for your Store (for Enterprise Accounts only). On the left-side, select Settings. On the Settings page, under Payments click Payment Settings.

- Manual Submit for Credit Card – If Enabled (set to YES), then after taking payment a Bartender or Server must press Submit to close an Order.
- Tokenize the Credit Card – If Enabled (set to YES), then Card details will be saved for the selected (highlighted in pink) Service Type(s).
- Restrict Loyalty Payment on Membership Discount – If Enabled (set to YES), if a Member Discount is applied then payment via loyalty credit will be restricted.
- Include Service Charge for Refunds - If Enabled (set to YES), then Refunds will include any previously applied Service Charge.
- Offline Payments Settings - If Enabled (set to YES), the Confirm pop-up appears stating your responsibility when accepting offline payments. Select Confirm, the Offline Payments section appears with limitations along with the below fields.
- Each Offline Payment Amount Limit - For the Limit Amount, enter maximum value that can be processed for each offline transaction.
- Total Offline Payments Limit - Enter the Maximum Amount that represents the sum of all payments during the offline period.
- The Maximum Amount must be greater than the Limit Amount. Both values must be greater than 0.00.
- For Payment Surcharge, select Yes (Enabled) then select the desired Surcharge Type:
Surcharge (formerly Cash Discount)
- Enter the Fee Name (Mandatory, maximum 25 characters). Displayed on the Receipt.
- Enter the Surcharge Name (maximum 25 characters). Displayed in the POS/Receipt.
- Enter the Surcharge Percentage (Mandatory, cannot exceed 100). Used to calculate the discount in the POS.
Service Charge
- When clicked, you can view the list of all the previously created Service Charges, with the corresponding Service, Tip and Gratuity Charges – along with Actions to Edit or Delete. If no Service Charges currently exist, then the message 'Service Charge not found' appears.
- To create a new Service Charge, click + New Service Charge on the right – the New Service Charge pane appears. To edit an existing Service Charge, click Edit (pencil icon under the Actions column – the Update Service Charge pane appears.
- On the New/Update Service Charge pane:
- Select the Card Type (includes Cash, Credit Cards, Gift Cards, ATH, EBT, etc.).
- Enter any Service Charge (percentage with up to two decimal points, cannot exceed 100).
- Enter any Tip Charge (percentage with up to two decimal points, cannot exceed 100).
- Note: It is not mandatory to enter both a Service Charge and Tip Charge, but at least one of the two must be entered.
- Enter any Gratuity Charge (percentage with up to two decimal points, cannot exceed 100).
- When the Service Charge is ready to be created or updated, click the Save & Add or Update button at the bottom right. The service charge will appear as a listing on the main Payment Settings table, with the corresponding entered Charge type(s).
Dual Price (Cash Reward)
- Enter the Name (how it will appear on the receipt).
- Enter the Percentage amount of the reward (discount on the price).
- Select whether it will apply Before or After Tax.
To Exempt a Surcharge from a Payment Method:
- Navigate to Settings > Payments > Payment Methods.
- Click + Payment Method or click the pencil icon on an existing Payment Method. A pane appears on the right side of the screen.
- On the Payment Method pane: to exempt the Payment Method from the Surcharge, ensure that Exempt Surcharge is Enabled (YES). Click Save or Update to confirm.
- Note: In POS, when selecting a Payment Method with a Surcharge for a check, the Surcharge Type will be applied. When there’s a Method that’s Surcharge Exempt, the field will appear as 0.00.
Related Articles
Retail Back Office: Store Payment Settings
Navigation: Sign into the Back Office for your Retail Store. On the left-side Navigation Panel, click Settings. On the Settings page, under Payments click Payment Settings. On the Payments Settings page: Tokenize the Credit Card – If Enabled (set to ...Back Office: Payment Method Settings
Navigation: Sign into the Back Office for your Store. On the left side, select Settings. The Settings page appears. Under Payments select Payment Method. The Payment Methods page displays a table of all existing Payment Methods under the Store. If no ...Back Office: Store Notifications Settings
Navigation: Sign into the Back Office and select a Store. On the left-side Navigation Panel, click Settings. On the Settings page, under Store select Notifications. On the Notifications screen: there is a YES/NO toggle for the following options: ...Retail Back Office: Payment Method Settings
Navigation: Sign into the Back Office for your Retail Store. On the left-side Navigation Panel, click Settings. On the Settings page, under Payments click Payment Method. The Payment Method page displays a table of Payment Methods that were created ...Retail Back Office: EMV Payment Settings
Navigation: Sign into the Back Office for your Retail Store. Click Settings, then on the Settings page under Payments click EMV Settings. The EMV Settings page displays a table of EMV Settings currently existing for this Store. If no EMVs have been ...