Back Office: Table Layout Application Settings
Navigation: Sign
into the Back Office and select a Store. On
the left-side, click Settings. On the Settings page, under Application click Table Layout. The Table Layout screen appears.
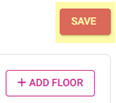
Reminder: After any update to a Floor, make sure you click Save then Publish at the top right of the Table Layout screen.
Adding A New Floor
- To add a new service Floor, click + Add Floor. The New Floor pane appears.
- Enter the Floor Name (Dining Room, Bar, etc.).
- Enter the Order Sequence.
- Enter the Dimensions of the floor space (Width and Height).
- Select the Floor Background (Color, Select From Gallery and Upload an image).
Color
- Click the small colorized square next to the large one. The Standard Color pane appears.
- Select the Standard Color and use the slider to adjust the shade.
Select From Gallery
- Click the second icon (photo). The Select Image pop-up appears.
- Select the appropriate background. You are returned to the New Floor screen.
- To remove the gallery image as the floor background, hover your mouse over the preview image and click the Trash Can icon.
Upload Image
- Click the third button option (document with up arrow). A directory pop-up appears.
- Navigate to the image you want to use to represent the floor, then either double-click the file or click and click Open.
- Note: If you’re currently using an image from the gallery, it overrides any file you upload. You need to remove the gallery image as the floor background before uploading any image.
- When
complete, click Save. The floor will appear as a main tab on the Table
Layout page.
Managing
Current Floors
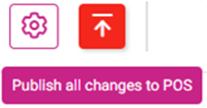
After you make any updates to a Floor, click Save then Publish.
- Your current floors appear as main tabs on the main Table Layout page. The currently selected one will appear as pink font with pink underline.
- Tip: You can remove the gridlines from the view of your floor by clicking the button at the top-right of the floor.
Adding
to a Floor
- You can add Tables or Static Objects (to account for bars or barriers) to your floor.
- Table – Start with an oval or rectangle
- Static Object – Start with a rectangle
- To add a Table or Static Object, click it. It instantly appears on your floor and is selected (indicated by an outline with menu options). Click and drag the table/object to its floor location. You can also choose the number of Seats available.
Managing
a Table
Select a table, then the managing options appear:
Edit
- You can also double-click a table to edit it) Update the Name, Number of seats then select the Table Shape as needed, then click Update.
Delete
- The Delete Table pop-up appears. Click Yes to confirm. Otherwise, click Cancel.
Duplicate
- Select a table then click Duplicate. A duplicate of the Table will appear over top the original table and is selected with a slightly modified name. Go into Edit mode of the table and update the name of the new Table.
- Tip: The default Table naming convention is T[#] (T1, T2, T3, etc.). If the Table you’re duplicating has this naming convention, the duplicating Table will produce the next Table number in the sequence (Example: Duplicating a Table named T1 will produce a Table named T2).
- Reminder: After any update to a Floor, make sure you click Save at the top right of the Table Layout screen.
Managing
a Static Object
Edit
- Double-click the Static Object to enter Edit mode. The Edit pane appears. Update the Name and select the Table Shape, then click Update.
Change Color
- Click a Static Object then click Change Color. Select the Standard Color and use the slider to adjust the shade. When your color is selected, click Change Color again.
Delete
- The Delete Table pop-up appears. Click Yes to confirm. Otherwise, click Cancel.
Duplicate
- Select a table then click Duplicate. A duplicate of the object will appear over top the original object and is selected with a slightly modified name. Go into Edit mode of the object and update the name of the new Object.
- Tip: The default Object naming convention is T[#] (T1, T2, T3, etc.). If the Table you’re duplicating has this naming convention, the duplicating Table will produce the next Table number in the sequence (Example: Duplicating a Table named T1 will produce a Table named T2).
Table
Display Options
- How tables will be displayed in the system.
- Table Name – The Name of the Table as set in Table Layout.
- Guest Count – The number of Guests currently occupying the Table.
- Customer – Name of the party provided by the Customer.
- Employee – Name of the Employee currently serving the Table.
- Wait Time – Projected amount of time until the table is ready for a new party.
Print
QR Code
- Click the Print QR Code button to produce sheets of QR Codes for every Table of the current Floor.
Floor
Settings
- Click the Floor Settings button to update any information set when creating the Floor (see Adding A Floor). Click Update when complete.
Deleting
a Floor
- Click the Delete Floor button. The Delete Floor pop-up window appears. Click Delete to confirm. Otherwise, click Cancel or Close.
Related Articles
POS: Table Layout - Table Expiration Time
Back Office Navigation: Log into Back Office, then select Home > Settings > Application > General Settings On the General Settings page: enter the Table Expiration Time (in Minutes) based on the needs of the Store. This will serve as the threshold ...POS: Operation - POS Settings
POS Settings Navigation: Log into POS, then select Operation > POS Settings Note: Only Employees with the proper Role and Permission settings have access to POS Settings. Till Settings This section is used to define the behavior of Till Management. ...Back Office: General Application Settings
Navigation: Sign into the Back Office for your Store. On the left-side, click Settings. Under Application click General Settings On the General Settings page, the following features can be set: Prompt Tip Screen before Credit Card Screen - This ...Back Office: Wait List Application Settings
Navigation: With an Enterprise Account: sign into the Back Office and select a Store. On the left-side, click Settings. On the Settings page, under Application click Wait List. If you are a non-Enterprise Level user, you will be taken directly to the ...POS: Table Layout - QR Payment
The QR Payment option is a setting that is enabled in the Back Office that will add a QR Code to the Customer Receipt for the customer to use to pay for their order. Note: The online ordering module is required to use this option and must have Credit ...