Back Office: Third Party Integrations Settings
Navigation: Sign
into the Back Office. On the left-side click Settings. On the Settings page, under Integrations, click Third Party Integrations.
The Third Party Integrations page displays all integrations available for the Store - such as Urban Piper, DoorDash, Uber Eats, etc.
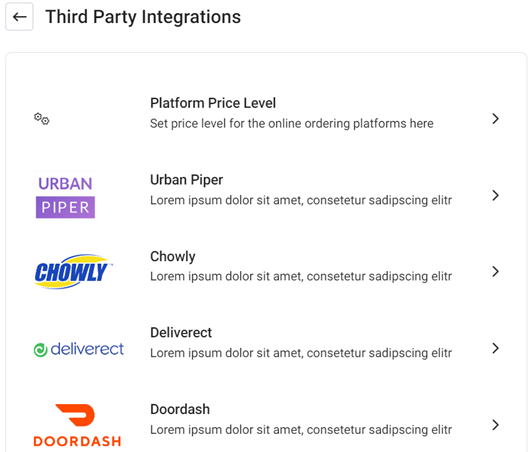
Select a below Integration to update its settings:
Chowly
The
integration setup is 2 sections: Store Publish and Menu Publish.
- Store Publish
- Chowly API Key – (Mandatory) Provided by the Chowly partner. Enter the key in the field.
- Store Delivery Time – (Mandatory) Enter the time for deliveries to the store.
- Publish Store Button – After the Key and Time are entered, click the button and the store will be available in Chowly.
- Menu Publish
- If the Publish Menu Items To Chowly toggle is Enabled (YES) and Publish Menu is clicked, then all the menu items (apart from Hide from OLO menu item) will appear on the online platform. If the toggle is Disabled (NO) then the Publish Menu button will be greyed out and no menu item will be published.
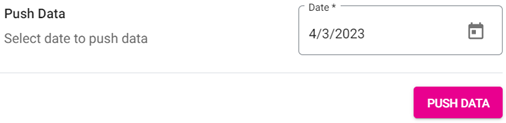
Compeat
Push Data – (Mandatory) Select the date
(calendar view) to push the data.
Deliverect
- Store Publish
- Account ID – (Mandatory) Provided by the Deliverect partner. Enter the Account ID field.
- Location ID – (Mandatory) Provided by the Deliverect partner. Enter the Location ID field.
- Publish Store Button – After the Account ID and Location ID are provided and the button is clicked, the store will be available in Deliverect.
- Menu Publish
- If the Publish MenuItems To Deliverect toggle is Enabled (YES) and Publish Menu Item is clicked, all the menu items (apart from Hide from OLO) will be displayed on the online platform. If the toggle is Disabled, the button is greyed out and the item won’t be published.
DoorDash
Enables
the store to integrate with the DoorDash delivery service.
- Store Action - If the Enable Doordash Drive toggle is Enabled (YES), you’ll be able to integrate the store with Doordash services. If Disabled, Doordash won’t be available.
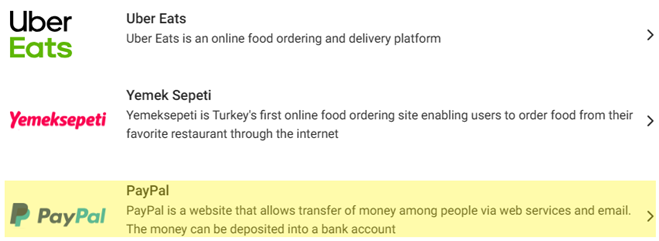
PayPal
The
PayPal page contains sections for NLA Merchant and Store Location.
- NLA
Merchant
- Owner Name – (Mandatory) Enter the store owner's First and Last Name with a maximum of 50 characters.
- Address Type – (Mandatory) Select from the dropdown (Business, Mailing, or Office).
- Street Address – (Mandatory) Enter the street address (not including City and ZIP Code).
- City, Town, or Village – Enter the city, town or village name in the textbox provided. This is mandatory field. When user fail to enter the city, town, village then the error message should be displayed as "Enter Address" in red color text.
- Zip/Postal Code – (Mandatory) Enter the Zip / Postal Code. It must be between 4 and 15 characters.
- International Email – (Mandatory) Enter an internationalized Email Address, since PayPal sends/receives payments globally. Letters, numbers, and special characters are accepted.
- Bank Name – (Mandatory) Enter the name of the bank, with a maximum of 50 characters.
- Account Number Type – (Mandatory) Enter the Type of Account based on the Number. There is no character count limit.
- Account Number – (Mandatory) Enter the number on the account (either International Bank Account Number [IBAN] or Basic Bank Account Number [BBAN] format), with a maximum of 50 characters.
- Rolling Number – (Mandatory) Enter the Routing Number based on the Bank Name, with a maximum of 50 characters.
- Bank Swift Code – (Mandatory) Enter the Bank ID Code (for countries that support BIC).
- Account Holder Name – Enter the account holder name in the textbox provided. This is the mandatory field to be entered. When user fail to enter the Account Holder Name then the error message should be displayed for the user as "Enter Account Holder Name" in red color text
- Merchant Category Code (MCC) – (Mandatory) Select the MCC from the dropdown (previously configured based on the store's Service Type). The options are the Code along with the Category (5812-Full Service Restaurant, 5813-Bar, etc.).
- Business Entity Type – (Mandatory) Select the business entity type from the dropdown (previously configured as default). The options contain the business type (Association, Corporation, Government, Individual, etc.).
- Identification Documents Type – (Mandatory) Select the identification document type from the dropdown (previously configured as default). The options contain the dropdown (Business Registration Number, Employer Identification Number, etc.).
- Business Type – (Mandatory) Select the type of business from the dropdown list (previously configured as default). The options include Doing Business As, Legal, etc.
- Identity Documents Name – This is not the mandatory field and user should enter name in the textbox provided. The character length should be 50 characters.
- Document Identification Number – (NOT Mandatory) Enter the ID Number. It allows for letters and number, with a maximum of 50 characters.
Legal Agreement Type - Displays TERMS ACCEPTED (Default).- Store Location
- Location Name – (Mandatory) Enter the store’s location name (maximum of 50 characters).
- Phone Number – (Mandatory) Enter the phone number (minimum of 10 digits).
- Street – (Mandatory) Enter street address (maximum of 40 characters).
- Apt, Suite etc. – (Optional) If applicable, enter further address details - such as Bldg., Apt., or Suite number (with a maximum of 40 characters).
- City – (Mandatory) Enter the city where the store is located (maximum of 25 characters).
- State – (Mandatory) Enter the state where the store is located (maximum of 25 characters).
- Zip/Postal Code – Enter the ZIP Code where the store is located (between 4 – 10 characters).
- Country – Select the country from the dropdown. Country showed in the drop down can be used from google template. This is mandatory field.
- Map View – Click Get My Location to view the store’s location on the map.
- The Map option has a Terrain checkbox to change the view of the map.
- Zoom In / Out
- In: Click the plus sign [+], or roll your mouse wheel up while holding the CTRL key.
- Out: Click the minus sign [-], or roll your mouse wheel down while holding the CTRL key.
- Full Screen: Click the four corners button at the top-right of the map to view it in full screen.
- Satellite View: User should be able to view satellite view of the map. Label option should be provided under satellite.
- Label Enable/Disable Option: When enabled Labels will be shown in the map. when disabled Labels will not be shown in the map.
- Street View – If you drag and drop the orange person icon on the map, the street view for that specific location will appear.
- Availability – (Mandatory) Select the store’s availability (Open or Close) from the dropdown.
- Gratuity Type – (Mandatory) Select the type of gratuity (Standard or None) from the dropdown.
- Save – When all Paypal settings are entered/updated, click Save. The button will only be clickable only when all mandatory fields are filled in.
Platform Price Level
Set the Price Level for online ordering with the Order Platform Price Level, with columns for Platforms, Menu Item Price Levels, and Modifiers %.
- Platforms – The names of the platforms that are currently integrated with Linga.
- Price Level – Set the price level from Price Level 1 to Price Level 9.
- Modifiers % – Set the modifier percentage. The percentage is calculated from the base modifier price, and price will be increased on the online ordering platform. It should not be more than 100 with up to 2 decimal places. Any percentage above 100 generates an error message.
- Once all Price Levels and Modifiers % are set, click Save at the top of the screen. The updated information will be saved, and you are returned to the Third Party Integrations screen.
Restaurant 365
Export Data – (Mandatory) Select the date
(calendar view) to export the data.
Uber Eats
Contains sections for Store
Publish and Menu Publish.
- Store Publish
- Location ID – (Mandatory) Provided by the Uber Eats partner. Enter the ID in the field.
- Activate Integration – (Mandatory) If Enabled (YES), the store will be able to integrate with Ubers Eats. If Disabled (NO), the store won’t be able to integrate.
- Menu Publish – If the Publish Menu Items To Uber Eats toggle is Enabled (YES) and you click Publish Menu Item, all the menu items (apart from Hide from OLO) will be displayed on the online platform. If Disabled, the button will be greyed out and no menu item will be published.
Urban Piper
The integration setup is 3 sections: Store Action, Integration Action, and Menu Item Action.
- Store Action – If Enabled (YES), the stores will be published in Urban Piper. When all toggles are set, click Store Action.
- Integration Action – If Enabled (YES), the below stores will be published in Urban Piper. When all toggles are set, click Publish Store.
- Menu Item Action
- Menu Action Item button - If Enable Menu Item Action is Enabled (YES) and Menu Item Action is clicked, the Menu Item will be synced on the online platform. If Disabled (NO) and Menu Item Action is clicked, the item will not be synced. If there were no changes and Menu Item Action is clicked, the error message ‘Menu Item has not synced’ will appear.
- Publish Menu Item button - If Enable Menu Item option is Enabled (YES) and Publish Menu Item is clicked, then the Menu Item will be published on the online platform. If Enable Menu Item option is Disabled (NO) and Publish Menu Item is clicked, the menu item will not be published. If there were no changes and Publish Menu Item is clicked, the error message ‘Menu Item has not synced’ will appear.
Yemek Sepeti
Yemek Sepeti is Turkey's first online food ordering site enabling users to order food online from their favorite restaurant.
- User Name, Password, Catalog Name & Category Name – Provided by the partner
- Service Time – Enter the store’s available timing.
- Is Restaurant Open – When enabled, the restaurant will be available for online ordering. When disabled, the restaurant will not be available for online ordering.
Related Articles
Back Office: Fiscal Integrations Settings
Sign into the Back Office for your Store. On the left-side, click Settings. On the Settings page, under Integrations click Fiscal. The Fiscal Integrations Settings page contains 2 tabs: Settings and Fiscal List. Settings Fiscal List Settings Displays ...Back Office: Table Layout Application Settings
Navigation: Sign into the Back Office and select a Store. On the left-side, click Settings. On the Settings page, under Application click Table Layout. The Table Layout screen appears. Reminder: After any update to a Floor, make sure you click Save ...Back Office: Additional Report Settings
Navigation: Sign into the Back Office and select a Store. On the left-side Navigation Panel, click Settings. On the Settings page, under Reports click Additional Settings. The Additional Settings page contains multiple toggles for fields to Enable ...Back Office: Marketing - Settings
Sign into the Back Office and select a Store. Onhe left-side Navigation Panel, select Marketing then Settings. The Settings page contains options to quantify the thresholds for types of Customers. Enter the number for each field, or use ▲/▼ to ...Back Office: Wait List Application Settings
Navigation: With an Enterprise Account: sign into the Back Office and select a Store. On the left-side, click Settings. On the Settings page, under Application click Wait List. If you are a non-Enterprise Level user, you will be taken directly to the ...