Back Office: Tip Out & Tip Sharing Report Settings
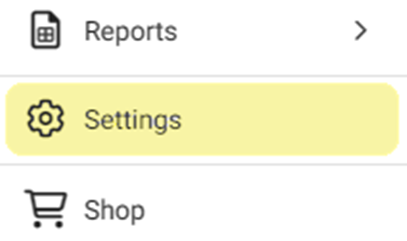
Navigation: Sign
into the Back Office for your Store. On
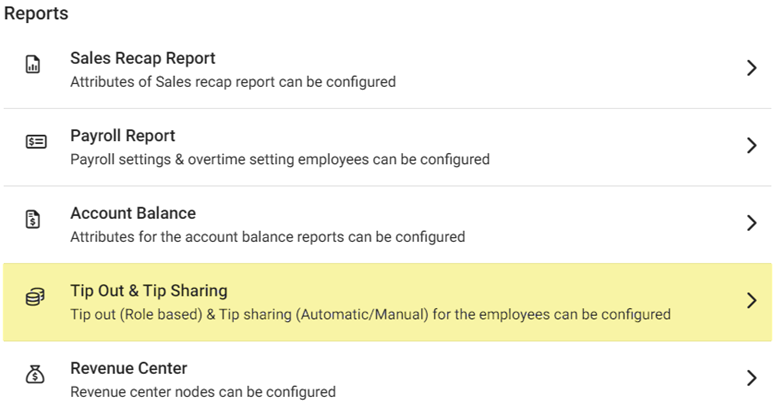
the left-side, select Settings. On the Settings page, under Reports select Tip Out & Tip Sharing.
The
Tip Out & Tip Sharing page contains 2 tabs: Tip Outs and Tip
Sharing.
Tip Outs
Tip Sharing
Tip Outs
Establish
the Tip Out policy for your Store/Restaurant
- Tip Out - If enabled (set to YES), then Tip Out functionality will be enabled for your Store and subsequent toggles will appear.
- Tip out based on percentage – Select whether the employee tip out will be paid from the percentage of Sales or Tips.
- Tip Share Per Hour – Select whether tip out sharing will be based on clock-in hours. If YES, the + NEW TIP OUT button will be clickable.
- + New Tip Out – When the button is clicked, the New Tip Out pane appears.
- TipOut Name – (Mandatory) Enter a name for the tip out. It can’t be greater than 25 characters.
- Role From – Select the role in the dropdown that that the tip out will be shared from (who the original tip was shared to). Only 1 role can be selected.
- Role To – Select the role of the employee responsible for the service. Only 1 role can be selected. Note: A Role From selection will not appear in the Role To options.
- Select Departments – Select one or more (or Select All) departments. All departments registered with your account will appear as dropdown choices.
- Percentage – Enter the percentage amount (or use ▲/▼ to increase/decrease the value by 1) of tip out to the employee. The value cannot be higher than 100.
- When ready to create the new Tip Out, click Save at the bottom-right.
- You are returned to the Tip Outs tab where the confirmation message ‘Tip Out/Tip Sharing Saved Successfully’ appears.
- Click Cancel to discard entered information and cancel the creation of the new tip out.
- The newly created Tip Out will appear as a row on the below table.
- Tip Out & Tip Sharing Table – Appears below the toggles and + Tip Out button. It contains a listing of all the Tip Outs created as rows with the corresponding fields: Name, Role From/To, Departments, and Percentage.
- Delete – Under the Actions column, select the Delete (Trash Can) button at the end of a Tip Out row to delete it. The Delete pop-up appears. Select Delete to confirm deletion or Cancel / X Close to keep it.
Tip Sharing
Establish
the Tip Sharing policy for your Store / Restaurant
- Manual Tip Sharing – A toggle for sharing the collected Net Tip. If Enabled (YES), select one or more Roles (or Select All) that the overall tip will be manually uniformly shared with.
- If Disabled (NO), the overall tip will not be manually shared.
- Automatic Tip Sharing – A toggle for sharing the collected Net Tip. If Enabled (YES), select one or more Roles (or Select All) that the overall tip will be automatically shared with.
- Note: The Manual and Automatic toggles cannot both be Enabled at the same time.
- If Disabled (NO), the overall tips will not be automatically shared.
- Tip Charge Deduction Before Tip Share – A toggle for deducting the tip charge before the tip is shared with the employee(s). If Enabled (YES), the charge will be deducted. If Disabled (NO), it will not be deducted.
- Include Below In Tip Share – Select the checkboxes of the tip types to be included in tip sharing: Online Pickup, Declared Cash, Gratuity, and Driver Compensation.
- When ready, click Save at the upper-right. The Tip Sharing updates are saved and the ‘Tip out/ Tip Sharing Updated Successfully’ confirmation message appears.
Related Articles
Back Office: Employee Report
Navigation: Sign into the Back Office and select a Store. On the left-side, select Reports then Employee. The Employee report page displays a comprehensive set of data on your staff, with the following tabs: Attendance Role Based Payroll Labor Labor ...Back Office: User Management - Roles
Navigation: Sign into the Back Office and select a Store. On the left-side navigation panel, select User Management then Roles. Create or Update a Role On the Roles page, click + New Role at the top-right. You can update a Role by clicking the ...POS: Payment Surcharge - Tip Charge for all Payment Surcharges
Introduction For all payment surcharges like Surcharge and Dual Price, a Tip Charge will be available. Currently, the Tip Charge is only calculated for Service Charge (here the Tip Charge is calculated based on the Card Type selection). Back Office ...Back Office: Additional Report Settings
Navigation: Sign into the Back Office and select a Store. On the left-side Navigation Panel, click Settings. On the Settings page, under Reports click Additional Settings. The Additional Settings page contains multiple toggles for fields to Enable ...Back Office: Payroll Report Settings
Navigation: Sign into the Back Office. On the left side, select Settings. On the Settings page, under Reports click Payroll Report. On the Payroll Report page, 3 tabs appear: Settings, Overtime Settings, and Manage Breaks. Settings Over Time Settings ...