Back Office: User Management - Creating or Updating a User
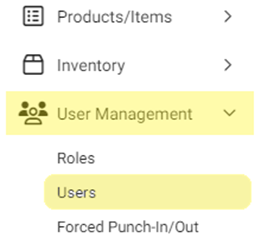
Navigation: Sign
into the Back Office for your Store. On the left-side Navigation Panel, click User
Management then Users.
Create or Update a User
- On the Users screen: click + New User at the upper-right (or for an existing User select the corresponding three dots under Actions then Edit.
- When adding or editing a User, the following fields will be Mandatory: Name, Last Name, Language, POS Initial Screen, PIN, Roles, and Password (new user).
- Select whether to Enable User Sign In (requires User to enter Email and Password).
- This allows users to sign in to the Back Office or Schedule app with their own Email and Password. If you would not like to allow this, then set it to NO.
- Enter the user's First and Last Names (Mandatory).
- Select the user’s Gender and enter their Date Of Birth (if necessary).
- Enter the user’s Phone Number (if necessary) and E-Mail (Mandatory).
- Select the user’s primary Language (Mandatory) then enter their Date Of Joining (first day of employment).
- Select what you’d like the Initial Screen to be for this user (Mandatory - what they see immediately upon logging in) – POS, Table, Bar, Retail.
- Enter a unique PIN number for the user (Mandatory) – minimum of 4 digits. Click the eye icon to reveal the PIN and double-check it. If the PIN is not unique, a red ‘Pin already exists’ banner appears.
User Photo (optional)
- Click the document with arrow
icon. A File Explorer pop-up window appears.
- Navigate to where the user’s photo is saved. Select the file and click Open or double-click it.
- File Format – JPG or PNG
- File Size – Maximum of 2 MB
- Resolution – Recommended 400px by 400px
Password
- Appears if the Enable User Sign In toggle is enabled (set to YES).
- For a new User: enter the user’s initial Password. When you click the Password field, the Set Password pop-up appears), enter the New Password then re-enter it in Confirm Password. A green circled checkmark appearing means a password's requirement has been met.
- Password Rules – The Password must include:
- Between 6 and 12 characters
- An uppercase character
- A lowercase character
- A number
- A Special character (such as !,@, #, or $).
- When the Password meets all requirements and both Passwords match, click Authenticate. If approved, the Password will populate both Password fields on the User page.
- Click the eye icon to reveal the Password and double-check it.
User Roles
- Select all the Roles (Mandatory) that the user can fulfill from the dropdown (these Roles are established under Roles).
Address
- Enter the user’s mailing Address (if necessary): Line 1 (Street), Apt/Suite/etc., City, State, ZIP.
Payroll
- Enabled after User’s profile is saved for the first time (a pop-up appears confirming you want to set up Payroll).
- Or for an existing User you can click + Add Payroll.
- Select whether the Wages are By Hourly or Monthly, and the Effective Date.
- If Hourly, set the Hourly Wage By Role based on the Roles you selected for the User.
- If Monthly, set the Monthly Salary ($).
- When Payroll is set, click Save at the bottom right of the pane.
Other Settings
- Clock Required – Select whether to require the User to Clock In before they can make Sales on the POS system.
- Do Auto Cashier Out – Select whether to automatically Cash Out the user at the end of their scheduled shift.
- Cash Tip – Select whether to enable a Cash Tip for the User. If Yes, enter the Cash Tip Percent (type the % or use ▲/▼ to increase/decrease the value (increments of 1).
- Sync to Schedule – Select whether to Sync the user to the operation-wide Schedule.
Related Articles
Retail Back Office: Scheduler
Shift Management can be performed on the Scheduler screen. Navigation: Log into Back Office for your Retail Store, then select Scheduler > Scheduler The Scheduler screen displays the following details and information: Note: The Scheduler screen ...Back Office: Scheduler
Shift Management can be performed on the Scheduler screen. Log into Back Office then select a Store. On the left-side navigation screen, select Scheduler then Scheduler. The Scheduler screen displays the following details and information: Note: The ...Retail Back Office: User Management - Creating a New User
Navigation: Sign into the Back Office for your Retail Store. Select User Management > Users. General On the Users screen: click + New User. The New User screen appears. Select whether to Enable User Sign In (requires User to enter Email and Password, ...Back Office: User Management - Roles
Navigation: Sign into the Back Office and select a Store. On the left-side navigation panel, select User Management then Roles. Create or Update a Role On the Roles page, click + New Role at the top-right. You can update a Role by clicking the ...Retail Back Office: User Management - Editing an Existing User
Navigation: Sign into the Back Office. for your Retail Store, then select User Management > Users. On the Users screen: identify the User to be updated and under the Actions column click the corresponding three dots ••• then select Edit. When adding ...