Back Office: User Management - Tip Adjustment
Navigation: Sign
into the Back Office for your Store. On
the left–side Navigation Panel, click User Management then Tip
Adjustment.
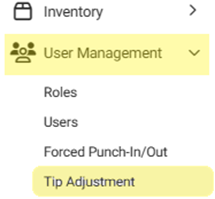
On the Tip Adjustment page that appears:
- Select the Billing Date and Employee Type, then click Apply.
- Billing Date filter – Select the Billing Date (calendar view).
- Employee Type filter – Select the Employee Type from the dropdown.
- After clicking Apply the header tile values will be updated – as well as employee data appearing as rows in the table:
- Manual Tip Shared - Manual tip shared for the list of employees.
- Remaining Manual Tip Shared - The remaining manual tip after sharing with employees.
- Tip Out Shared - The shared tip out for the employees.
- Remaining Tip Out Shared - The remaining shared tip out after sharing with employees.
- If no Tip Adjustments occurred based on the Billing Date and Employee Type selections, the header values all appear as 0.00 and the message ‘Tip Adjustment not found’ appears in the table.
- The following columns make up the Tip Adjustment table, based on the Billing Date:
- Name – The employee’s name
- Role – The employee’s role
- Reg Hours – The amount of Regular hours worked by the employee
- OT Hours – The amount of Overtime hours worked by the employee
- Total Hours – The sum of Regular hours and Overtime hours
- Total Tip – The Net Tip generated by the employee
- Net Sale – The Net Sales made by the employee
- Expected Tip – The amount of Expected Tip for the employee
- Manual Tip Sharing – Two sub columns will be shown – Shared / Adjusted & this field can be edited only with numbers
- Shared – The manual tip shared among employees
- Adjusted – The manual tip adjusted for the employee
- Tip Out – Contains two sub-columns for Shared and Adjusted
- Shared – The shared tip out for the employee will be shown
- Adjusted – The adjusted tip out will be shown , it cannot be edited
- Overall Tip – The sum of all the tips will be shown
- Logs – Upon clicking it a new window appears with the following details:
- Date – The date of the Tip adjustment [DD–MMM–YYYY, HH:MM PM/AM format]
- Adjust By – The ID of the Employee who performed the adjustment
- Tip Before Adjust – The manual tip value
- Tip After Adjust – The adjusted tip for the employee
- Tip Out Before Adjust – The tip out shared for the value by default will be shown
- Tip Out After Adjust – The adjusted tip out for the employee will be shown
- Click Close
to close the Logs window and return to the Tip Adjustment screen
- When ready, click Save.
- The button will be disabled unless any changes have been made to the Manual Tip Sharing Adjusted or Tip Out Adjusted columns.
Related Articles
Back Office: User Management - Roles
Navigation: Sign into the Back Office and select a Store. On the left-side navigation panel, select User Management then Roles. Create or Update a Role On the Roles page, click + New Role at the top-right. You can update a Role by clicking the ...Retail Back Office: User Management - Roles
Navigation: Sign into the Back Office for your Retail Store, then select User Management > Roles The Roles page appears, which displays a table of the currently existing Roles within this Retail Store, with the following columns: Create a New Role or ...Back Office: Employee Report
Navigation: Sign into the Back Office and select a Store. On the left-side, select Reports then Employee. The Employee report page displays a comprehensive set of data on your staff, with the following tabs: Attendance Role Based Payroll Labor Labor ...POS: Payment Surcharge - Tip Charge for all Payment Surcharges
Introduction For all payment surcharges like Surcharge and Dual Price, a Tip Charge will be available. Currently, the Tip Charge is only calculated for Service Charge (here the Tip Charge is calculated based on the Card Type selection). Back Office ...POS: Operation - Till Management (Till Tab)
The Till tab displays the following sub-tabs: Set Till Active Till Held Till Closed Till Set Till Set Till Setting a Till is entering the amount to Till starts with. Select Set Till, and the Open Till window appears. Enter the Denomination and Tip ...