Retail Back Office: EMV Payment Settings
Navigation: Sign
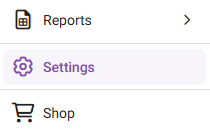
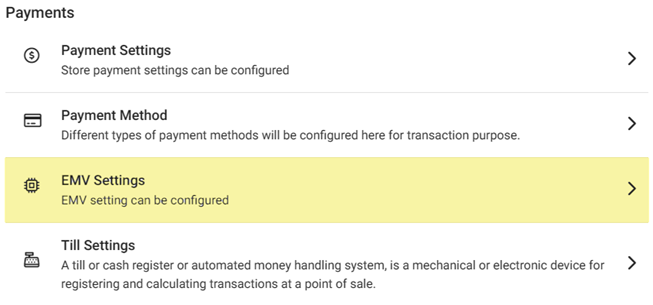
into the Back Office for your Retail Store. Click Settings, then on the Settings page under Payments click EMV Settings.
The EMV Settings page displays a table of EMV Settings currently existing for this Store.
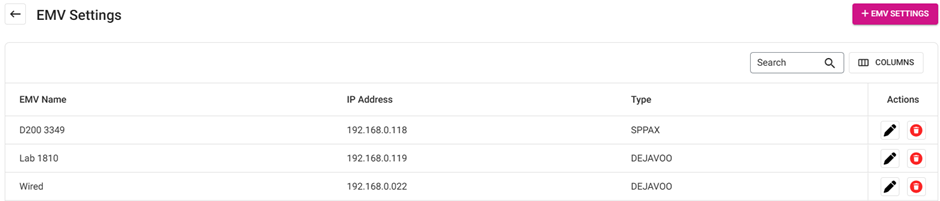
- If no EMVs have been added, the message ‘EMV Settings not found’ appears.
Create or Update an EMV Payment Setting
- Click +
EMV Setting to create a new EMV (or Update (pencil) for an existing EMV). The New EMV Setting pane appears.
- Note: The Type and supporting fields of an existing EMV cannot be edited.
- Name – (Mandatory) Enter the name in the field. It will be displayed in POS and can’t be more than 25 characters.
- IP Address – (Mandatory) Enter the IP Address in the field. Accepts letters and numbers.
- Type – Select an option from the dropdown (previously configured list). Additional fields will appear based on the selection.
- SP-PAX – Select a Serial Number from the dropdown. Based on this selection only SPPAX will be configured with POS. Select whether it’s a Go Device from the toggle (Enabled [YES] or Disabled [NO]).
- OPTOMANY, INGENICO, or CLOVER – The Port number will be configured and set by default. Click ▲ or ▼ to increase or decrease the value by 1.
- MONERIS – The Port number will be configured and set by default. Click ▲ or ▼ to increase or decrease the value by 1. Then select the Device Type from the dropdown.
- EVERTEC – Update the Port number and Terminal ID for the Evertec type.
- DEJAVOO – Enter the Auth Key, TPN and Token.
- Click Save to create the new EMV Setting (or Update for the existing one) and return to the main EMV Settings page. A new EMV will be added in POS and appear in the table.
- Click X Close at the top right (or Cancel at the bottom left) to cancel creating the new EMV and return to the main EMV Settings page.
Delete an EMV Payment Setting
- Identify the EMV to delete, then under Actions click the corresponding delete (trash can) button.
- On the Delete pop-up that appears, select Delete to confirm deleting the EMV. Please note to submit the batch before deleting an EMV settings.
- Select Cancel / X Close to keep the EMV and return to the page.
- You are returned to the EMV Settings page where the 'EMV Settings Removed Successfully' confirmation appears at the upper-right and the EMV has been removed.