Retail Back Office: Label Template Settings
Navigation: Log into the Back Office for your Retail Store. On the left-side Navigation Panel, click Settings. On the Settings page, under Printer Templates, select Label Templates.
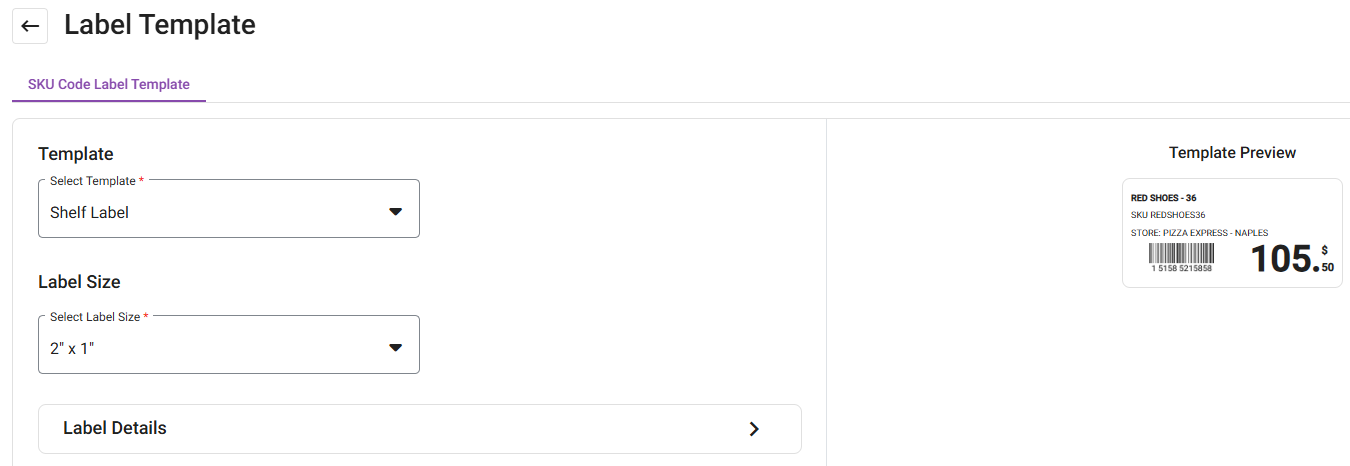
The Label Template screen allows you to customize what prints on labels, along with a Template Preview.
SKU
Code Label Template
- Select a Template for the Label: Inventory, Shelf, Product or Price.
- Selection of the template will alter the label's layout and the availability of Label Details options.
- Select the Label size (Width x Length, dimensions in inches): 2" x 1" or 2" x 0.75".
- 2" x 1"
- 2" x 0.75"
Label Details
- Click the Label Details dropdown. Note: Availability of the below fields (and whether they can be edited) will be based on your Template selection.
- Item Name - The name of item the label will be applied to.
- Store Name - The name of the selected Store.
- Price - The price of the single item.
- Date - The date the label was printed.
- Barcode - The unique barcode for the item to be scanned.
- SKU Code - The unique ID Number of the Item.
- Count - The number of units within a single packaging.
- By - The name of the employee who printed the label.
- Select the Font Size (Small, Medium, or Large). Note: Availability of size options will be based on your Template selection.
- When ready, click Save at the upper-right. After a moment, the confirmation banner 'Label Template Saved Successfully' appears.