Servme Integration
Prerequisites
- An active Servme account configured with Linga POS integration. Please contact POS support to get ApiKey, StoreID, AccountID, employee UserID, and employee UserToken which are required to configure the integration at Servme.
- Close and Update the order webhook URL from Servme.
Exclusions and Limitations
- Existing customers in Linga will not be available in Servme.
- Merging Checks within this integration can disrupt Reservation status and reporting in Servme. To ensure accurate tracking: avoid using this function for Reservations made through Servme.
- Any Refunds made will not be reflected in Servme.
- If a Check is split in the POS system: any newly created Check won’t appear in Servme, which only keeps track of the original Check's Status and Menu Items.
- Void transactions after payment will be marked left in Servme but excluded from Servme daily report.
- Void transactions before payment will not change the Reservation status in Servme. You must update the Reservation status in Servme manually.
- Only Menu Items (excluding Modifiers) and Check details are included in the Daily Report in Servme.
- Table layouts must be manually created in both Linga and Servme.
Data Flow and Notifications
- Servme notifies Linga POS only after the Guest arrives and the Reservation is marked as Arrived.
- The following information is shared from Linga POS to Servme.
- Guest Count updates
- Menu Items
- Invoice details: including payment methods, currency and discount amount
- Changes to the Reservation Table assignment
Enable Servme Integration
Navigation: Log into Back Office. On the left-side pane, select Home then Integration Hub.
- On the Integration Hub page, select Browse and Subscribe Integrations.
- Under the Reservation Management section: within the Servme integration tile click Add.
- On the Disclaimer page that appears: after selecting the Terms and Conditions box at the bottom left, click Confirm at the upper right. You will be redirected to the Configure and Manage Integrations page.
Update the Servme Webhook URL
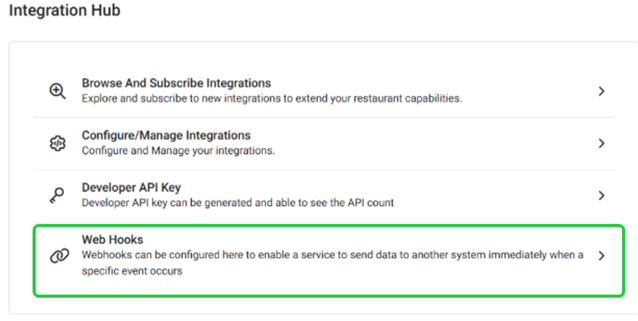
Navigation: For your Store: on the left-side pane, select Integration Hub then select Web Hooks.
- Enable the Close Order Web Hooks Is Active and Update Order Web Hooks Is Active toggles (set both to YES).
- Update the Close Order Web Hooks and Update Order Web Hooks fields with the webhook URLs from Servme.
Post Integration Activations
New Reservation
- A Reservation is assigned to a Table and marked Arrived in Servme.
- POS will receive it and will display under the Check Status > Active section with the following assigned information as Column values:
- Table of Tab
- Check No (Number)
- Type of Service
- Time Open (the time the Check was made)
- People (number of occupants at the Table)
- Server type
- Check Total
- Check Amount Per Customer
- Select the Check then click Open Check.
- Once the Check is opened in POS, the Order can be taken. The Customer's Name will be displayed at the top.
- Click the Customer's Name to view their personal details and any Reservation notes.
Close Check in POS
- When an employee closes a Check with full payment in POS, then Servme will be automatically notified with invoice information included.
- Invoice details can be viewed in Servme under the Reservation History of the Customer.
Transfer Table Reservation
To move a Check to another Table:
- On the main POS page: select the Table Layout tab (next to Check Status), then select the Transfer option at the bottom.
- Choose Transfer to Table, then select the source Table Number. The assigned Check will appear under the middle Checks section. Select the Check, then select the destination Table Number. When you're ready to transfer the Check, click Done at the bottom-right.
- The updated Table Number will appear on the Check in Servme, and the Table will be moved accordingly.
Payments
- On the Order screen, click on Payment at the bottom-right of the screen.
- Enter the Amount then select the Payment Method, such as cash, loyalty, gift card, etc.
- When ready to submit payment, click Submit.
- The Payment details will appear in Servme’s Daily Report, under the Payment Methods column.
Discount
Before creating an Invoice: apply a Discount (if any):
- On the Order screen: click Option on the bottom bar. Then on the Check Option pop-up click Discount.
- On the Discounts pop-up: select the type of Discount.
- After closing the Check: the Discount details can be viewed in Servme by navigating to Analytics. For the Daily Report, view the Discount column.
Customer Count Update
- Guest Counts can be increased by clicking the Plus (+) button at the top-right under the Customer's Name. The Customer Count will then be added.
- The update will be instantly reflected in Servme.
Related Articles
POS: Servme Integration
Back Office For more information on the Servme Integration, see the Servme Knowledge Article. POS When a table is booked in the Servme portal: that information is shared to POS. When a Table Reservation happens in Servme, it is received in POS via ...Magento Integration
Magento Integration – User Manual PLEASE READ THIS MANUAL BEFORE INTEGRATING MAGENTO WITH THE POS APPLICATION TO ENSURE THE SYNCHRONIZATION PROCESS RUNS SMOOTHLY. See the attached file for a copy of this manual, which includes screenshots for a ...Wix Integration Manual
Wix Integration – User Manual PLEASE READ THIS MANUAL BEFORE INTEGRATING WIX WITH THE POS APPLICATION TO ENSURE THESYNCHRONIZATION PROCESS RUNS SMOOTHLY. See the attached file for a copy of this manual, which includes screenshots for a visual ...Octopus Integration – User Manual
Octopus Integration – User Manual 1. About This Manual v This manual documents how to connect Octopus to the Linga application. v Please read this manual before integrating Octopus with Linga to ensure proper synchronization. 2. Implementation In ...Shogo Integration
Subscribe and Configure in Back Office Page Navigation: Log into Back Office. On the left-side pane: select Home then Integration Hub. On the Integration Hub page, select Browse and Subscribe Integrations. Under the Inventory Management section: for ...