Settings - Printer Configuration - Email Receipt Template
Settings>Printer Configuration>Email Receipt Template
o Sign into the LingaPOS back office online at mystore.lingapos.com
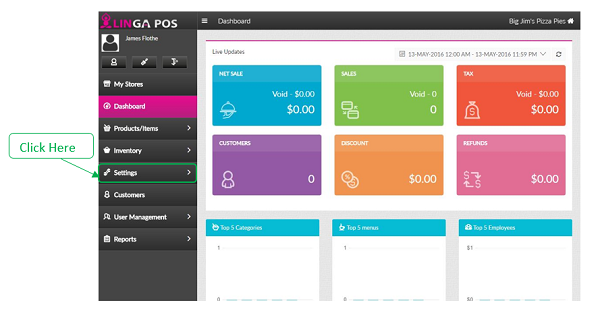
o Click on the Settings tab on the Navigation Panel

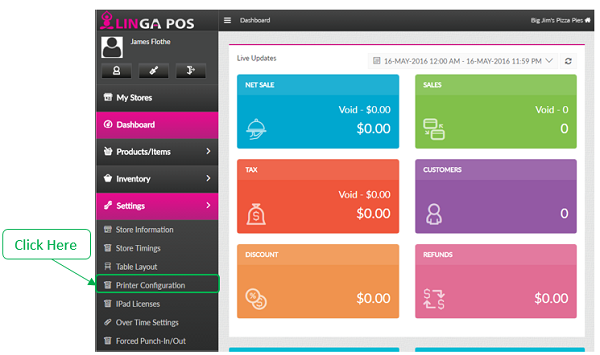
o Click on the Printer Configuration tab

o Click on the tab

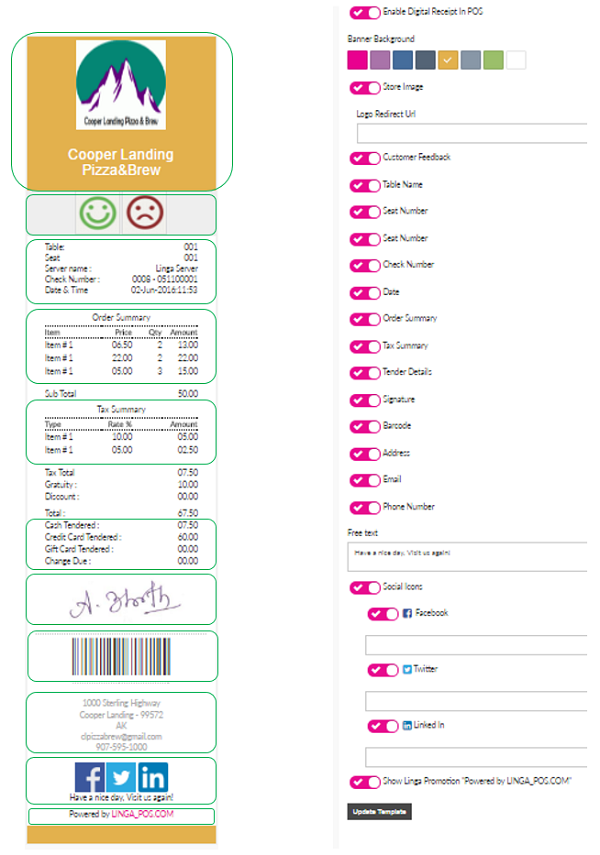
o Enable Digital Receipt in POS – This configures whether a screen displays at the end of each sale allowing the customer to choose a digital receipt via Text, Email, or Paper
o Enable the following options if you want them to appear on the receipt
§ Banner Background – Select from the available colors or choose clear
§ Store Image – this can be selected under the BackOffice>Settings>Store information tab or you can enter a Logo Redirect URL if the log is stored on the internet
§ Customer Feedback
§ Table Name
§ Seat Number
§ Server Name
§ Check Number
§ Date & Time
§ Order Summary
§ Tax Summary
§ Tender Details
§ Signature
§ Barcode
§ Address
§ Phone Number
o Customer message – Configurable message that prints at the bottom of each receipt
o Social Icons
§ Facebook – put your link in the provided box
§ Twitter – put your link in the provided box
§ Linked In – put your link in the provided box
o Show Linga Promotion “Powered by LINGA_POS.com”
o
Press the button when finished to save changes
Related Articles
Printer Settings and Configuration
Settings > Printer Configuration Front End Receipt- Configure what you would like to include on the customer check. If you would like to add your logo be sure to use black and white and no bigger than 300x300. Kitchen Receipt Template- Chose what ...Adding a Receipt Printer
Adding a Receipt Printer to the Back Office: Select “Settings”, “Printer Configuration”, “Receipt Printers” Select “+Receipt Printer” Type in the IP address from the ticket and press “Update”Email Receipt template
BOH Manuals Email Receipt Template Go to Settings>Printer configuration>Email Receipt Template Turn on or off any info you do or do not want to show up on these receipts. These changes will reflect on the left. Once finished hit update templateSettings - Printer Configuration - Kitchen Receipt Template
Settings>Printer Configuration>Kitchen Receipt Template o Sign into the LingaPOS back office online at mystore.lingapos.com o Click on the Settings tab on the Navigation Panel o Click on the Printer Configuration tab o Click on the ...Email Receipt Template