Retail Back Office: Employee Reports
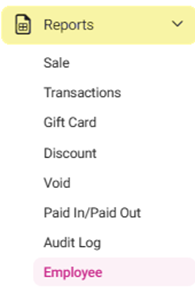
Navigation: Sign into the Back Office and select a Retail Store, then select Reports > Employee
The Employee Reports page displays a comprehensive set of data on the activity of the Store's employees, with tabs for the following:
Attendance
Role Based Payroll
Labor
Labor By Job Code
Break In/Out
Attendance
Displays information about
Employees’ Attendance record. This includes check-in, check-out and break time.
- Filter by the following options:
- Employee – Select the name of the Employee from the store, or All employees.
- Format – Select the format of how the attendance is displayed (In Time or In Hours).
- Active/Inactive – Select how to filter by Employee status (Active or Inactive), or All (both statuses).
- After selecting all filters as needed (including Time Period), click Apply
- The Attendance table is populated, and contains the following columns:
- Date – The business date (DD-MM-YYYY format).
- Name – The name of the Store's employee.
- Employee ID – The ID number of the Store's employee (optional).
- Check In – The time the employee checked in (HH:MM PM/AM format).
- Check Out – The time the employee checked out (HH:MM PM/AM format).
- Total UnPaid Break – The total time the employee took a break without pay (HH:MM format).
- Hours – The number of working hours the employee has accrued (based on the selected Format).
- Job Code – The employee’s Job Code.
- Total – The sum of the Hours column., which represents the total number of hours worked during the selected time period.
Role Based Payroll
Displays information about the Store's payroll by Employee, broken down by Role.
- Filter by the following options:
- Employee – Select from the list of employees who set the Till.
- Process – Select from the rate at which payroll is processed:
- Daily – Table displays information based on the Business Date.
- Weekly – Table displays information based on the day set in Payroll Settings (If Monday is selected, the report will run until Sunday for the week).
- Daily/Weekly – Table displays information based on what was selected in Payroll Settings.
- Format – Select either In Time (Hours and Minutes) or In Hours (Total Minutes / 60).
- Status – Select based on the status of the employee(s) (Active, Inactive, or All).
- Sort By – Select how to alphabetically sort the selection of employees:
- A-Z FirstName – by first name alphabetically
- A-Z LastName – by last name alphabetically
- Z-A FirstName – by first name reverse alphabetically
- Z-A LastName – by last name reverse alphabetically
- Role – Select a Role (or All) from the list of roles as established in User Management for the Store.
- Bi-Weekly – If selected, the report will consider first 1-15 days in one set and the next 16-28/29/30/31 days in the second set. This will function regardless of Daily, Weekly, or Daily/Weekly settings. When selected, the following additional fields will appear:
- Year – Enter the Year. The current year will appear by default.
- Month – Select the Month from the dropdown. Any future months will not appear.
- Month Type – The options All, First Half and Second Half will appear.
- All – It will consider both the first and second halves.
- First Half – It will consider first 1-15 days. If the current date is 10, then it will not display a future date, and the first half will consider from 1-10 only.
- Second Half – It will consider the first 16-28/29/30/31 days. If the current date is 20, then it will not display the future date, and second half will consider from 16-15 only.
- Click Apply. A table appears based on your selection from the Process dropdown:
Daily or Weekly
- Role Based Payroll > Daily Process Table – The table is viewed based on when Daily is selected from the Process dropdown. The below columns are displayed. Use the horizontal scroll bar to view columns to the right/left.
- Role Based Payroll > Weekly Process Table – The table is viewed based on when Weekly is selected from the Process dropdown. The below columns are displayed (same as Daily Process). However, if the Show Summary only toggle is selected, then only the Summary row is shown. Use the horizontal scroll bar to view columns to the right/left:
- The Payroll week start day (set from the Weekly status) is shown. Example: If Monday is selected and if the employee has worked all days from Monday to Sunday, the working hours on Saturday and Sunday will be considered as overtime hours.
- If hours have been entered between weeks, the hours will be split proportionally for the days.
- If the employee has worked more than 40 hours in the first 3 days, then the next 3 days are considered OT hours.
- Name: The Name of the employee.
- Emp ID: The Employee ID of the employee.
- Date: The Business date for the employee.
- Role: The Role of the respective employee.
- Role ID: Role ID of the employee
- In/Out: Time that the employee Clocked In/Out. If there’s two sets of times on the same day, they will be populated separately on the same line item.
- Pay Rate: The payment set from the back office will be set in this page.
- Reg Hrs: The regular hours for the employee will be listed in this column
- Reg Pay: Regular pay for the respective employee.
- OT Hrs: The overtime hours.
- TTL OT Pay: Total overtime pay for the employee will be available.
- TTL Hrs: Total hours will be the sum of Normal hours plus over time hours.
- TTL Pay: The total payment (Regular + OT) for the employee.
- Net Sales: The overall net sales for the employee on the business date.
- OT Hours 1: First set of OT hours.
- OT Pay 1: The amount of pay from OT Hours 1 (percentage set in OT 1 Settings).
- OT Hours 2: Second set of OT hours.
- OT Pay 2: The amount of pay from OT Hours 2 (percentage set in OT 2 Settings).
- OT Hours 3: Third set of OT hours.
- OT Pay 3: The amount of pay from OT Hours 3 (percentage set in OT 3 Settings).
- Overall Pay: The sum of the employees Registered Pay + OT Pay.
- Role Based Payroll > Daily Process Table – The table is viewed based on when Daily is selected from the Process dropdown. The below columns are displayed. Use the horizontal scroll bar to view columns to the right/left.
Daily/Weekly
The table is viewed based on when Daily/Weekly is selected from the Process dropdown. The below columns are displayed. Use the horizontal scroll bar to view columns to the right/left:
Labor
Displays information about Employee payroll, based on their activity and shift status.
- Filter by the following fields then click Apply.
- Employee – Select an employee based on roles registered in User Management.
- Or Search to find an employee more quickly.
- Process – Select from the rate at which payroll is processed:
- Daily – Table displays information based on the Business Date.
- Weekly – Table displays information based on the day set in Payroll Settings (If Monday is selected, the report will run until Sunday for the week).
- Daily/Weekly – Table displays information based on what was selected in Payroll Settings.
- Format – Select In Time (Default, Hours and Minutes) or In Hours (Total Minutes / 60).
- Active/Inactive – Select based on the employee’s status (Active, Inactive, or All).
- Shift Status – Select In Shift (clocked in), Shift Closed (clocked out), or All (both).
- When Apply is clicked, the below columns are populated. Use the horizontal bar to scroll right/left.
- Name: The name of the employee.
- Employee ID: The employee id.
- Net sales: Net sales of the employee (up to 2 decimal points).
- Hours: Number of hours and minutes the employee has clocked in.
- Labor Amount: The hours worked by the employee multiplied by the wages given for the user.
- Note: For monthly calculation the format will be Monthly Salary / 30
- % of Net Sales: Formula = (Net Sale of Employee / Net Sale of all Employees) * 100.
- Labor Percentage: Formula = (Labor of each employee / Net Sales of all Employees) * 100.
- Shift Status: Status of the employee (In Shift or Shift Closed).
- Summary: Sum total of the values in the Net Sales, Net Hours, Labor, % of Net Sales and Labor Percentage columns.
Labor By Job Code
Displays information about Employee payroll.
- Filter by the following fields:
- Employee – Select an employee based on roles registered in User Management, or Search to find an employee more quickly.
- Process – Select from the rate at which payroll is processed:
- Daily – Table displays information based on the Business Date.
- Weekly – Table displays information based on the day set in Payroll Settings (If Monday is selected, the report will run until Sunday for the week).
- Daily/Weekly – Table displays information based on what was selected in Payroll Settings.
- Format – Select In Time (Default, Hours and Minutes) or In Hours (Total Minutes / 60).
- Active/Inactive – Select based on the employee’s status (Active, Inactive, or All).
- Role – Select a Role (or All) from the list of roles as established in User Management.
- Click Apply. A table appears based on your selection from the Process dropdown:
Daily
The below table appears based on Daily selected from the Process dropdown, and contains the below columns:
Weekly
The table is viewed based on when Weekly is selected from the Process dropdown. The below columns are displayed (the week number is in the first row, marking each section):
Daily/Weekly
The table is viewed based on when Daily/Weekly is selected from the Process dropdown. The below columns are displayed (the week number is in the first row, marking each section):
Break In/Out
Displays comprehensive information about Employees' both paid and unpaid break
activity when clocking in and out.
- Select from the following fields:
- Employee: Select an employee based on roles registered in User Management, or Search to find an employee more quickly.
- Break Name: Select the type of break, which is pre-defined in the Reason section (Break IN tab).
- Click Apply. A table with the following columns appears:
- Date: The date in which the employee took the break will be displayed in DD/MM/YEAR format.
- Employee: The name of the employee who took the break for the selected time period.
- Clock-In Event: The time the employee logged in.
- Clock Out: The time the employee logged out.
- Role: The role the employee fulfilled while logged in.
- Subsequent column sections will display the name of the Break as the header, whether it's Paid or UnPaid, and contain the Start Time, End Time and Duration of the taken break.
- Total UnPaid Break: The total time accrued taking UnPaid Breaks during the week.
- Total Paid Break: The total time accrued taking Paid Breaks during the week.
- Total Paid Hours: The total time accrued the employee is to be paid for the week.
Related Articles
Retail Back Office: Exchange Reports
Navigation: Log in to the Back Office for your Retail Store, then select Reports > Exchange The Exchange Report page that appears will display Today's data by default, but you can select a Time Period from the dropdown and select any Date(s) if ...Retail Back Office: Enterprise - Reports
Navigation: Sign into the Back Office. On the left-side Navigation Panel, click Enterprise. Select Enterprise Reports, and the dropdown contains options to access specific reporting Dashboards: Enterprise Reports Sale Report The Sale Report dashboard ...Retail Back Office: Refund Reports
Navigation: Log into the Back Office for your Store, then select Reports > Refund. The Refund Reports page displays a Store's Refund activity, based upon your selections. Select from the following fields: Employee: Select from the list of employees ...Retail Back Office: House Account Reports
Navigation: Log into the Back Office for your Store, then select Reports > House Account. House Account allows customers to have an account with your Store (like a Gift Card), but functions like a Credit Card where there is a limit and a balance. The ...Retail Back Office: Till Reports
Navigation: Log into the Back Office for your Store, then select Reports > Till The Till Reports page contains information about sales generated from both Tills, which are mechanical or electronic machines that allow businesses to take payments. It ...