Retail Back Office: Receipt Printer Hardware Settings
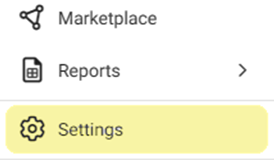
Navigation: Sign
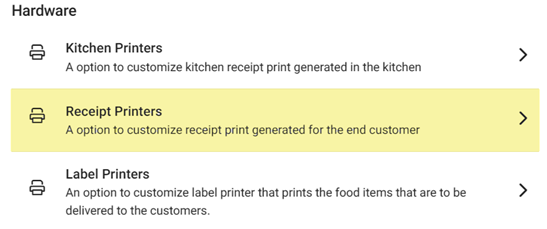
into the Back Office. On the left-side Navigation Panel, click Settings. On the Settings page, under Hardware click Receipt Printers.
The Receipt Printers settings page is broken down by the Printers and Settings tabs.
Printers
Settings
Printers
The Printers tab contains information about Receipt Printers that are currently part of your network, as well as the option to set up new Receipt Printers.
Create or Edit a Receipt Printer
- Click + New Receipt Printer to create a new Receipt Printer (or click the corresponding pencil icon
to edit an existing one).
- On the New / Update Receipt Printer pane that appears:
- Enter the Name (mandatory) of the Printer.
- Enter the printer’s IP Address (mandatory), which can be found when the printer is connected via an ethernet cable.
- Select the Printer Model from the dropdown.
- Select whether this printer should be set as the Default.
- Note: There can only be one Default printer at a time. If a printer is toggled YES as the Default (then saved), it will override whatever other Receipt Printer was previously the Default.
- If a Receipt Printer is currently the Default but then the Default toggle is set to NO, there will no longer be an assigned Default Receipt Printer.
- When ready, click Save (or Update). You are returned to the main Receipt Printers settings screen, with the 'Receipt Printer Saved / Updated Successfully' confirmation message appearing at the upper-right.
- Note: If a Receipt Printer has been created, it will appear as a row on the table.
Delete a Receipt Printer
- Identify the Receipt Printer to remove, then under the Actions column click the corresponding Trash Can icon
.
- On the Delete pop-up that appears, click Delete to confirm deletion of the Receipt Printer.
- Select Cancel or X Close to close the pop-up without deleting the Receipt Printer.
Settings
The Settings tab is for updating the settings of all Receipt Printers. Select whether any of the following will apply when printing receipts:
- Auto Print Receipt – If enabled (YES), a Receipt is automatically printed (if digital Receipt screen is not enabled).
- Show CC Receipt Screen – If enabled (YES), Displays a screen of the Credit Card screen.
- Print CC Customer Copy – If enabled (YES), a copy of the Credit Card Receipt is automatically printed for the customer.
- Show
Digital Receipt Screen – If enabled (YES), this screen appears after Payment is made on POS, and the Show Digital Receipt in CDS toggle appears.
- Show Digital Receipt in CDS – If enabled (YES), customer can select the Digital Receipt option on the Customer Display Screen (CDS).
- Show Signature Pad – Enables providing digital signature from customer.
- Print CC Merchant Copy – Automatically prints a Merchant copy of the Credit Card Receipt.
- Enable Itemized Receipt – Automatically prints Receipt in itemized form.
- If any updates have been made, click Update at the upper-right to confirm. The update(s) will be applied, and the 'Receipt Printer Settings Updated Successfully' confirmation will appear just over the Update button.
Related Articles
Retail POS: Printer Hardware Settings
Back Office For more information on Printer and Receipt Template settings, see the following Knowledge Articles: Receipt Printers Front End Receipt Template Label Template POS On the Hardware Settings page, select the Printer Settings tab. It ...Retail POS: Customer Display Hardware Settings
On the Hardware Settings screen, select the Card Reader tab. The screen displays the device name of the Customer Display which is connected to the POS. Back Office License Settings Navigation: Log into Enterprise, then select Settings. Under Licenses ...Retail Back Office: User Management - Roles
Navigation: Sign into the Back Office for your Retail Store, then select User Management > Roles The Roles page appears, which displays a table of the currently existing Roles within this Retail Store, with the following columns: Create a New Role or ...Back Office: Receipt Printer Hardware Settings
Navigation: Sign into the Back Office for your Store. On the left-side, click Settings. On the Settings page, under Hardware click Receipt Printers. The Receipt Printers settings page is broken down by the Printers and Settings tabs. Printers ...Retail Back Office: Label Printer Hardware Settings
Navigation: Sign into the Back Office for your Retail Store. On the left-side Navigation Panel, click Settings. On the Settings page, under Hardware click Label Printers. The Label Printers Settings page displays a table of Label Printers currently ...