Retail POS: SPPax Payments
Back Office (BO)
BO Admin Requirements
Navigation: Log into BO then select Admin > Stores
Under Admin Store(s):
- When enabling the SPPAX toggle (setting to Yes), the SPPAX Details screen appears.
- Enter the mandatory details (pax device serial number) then click Save.
BO Requirements
Navigation: Log into BO, select a Store, then select Settings > Payments > Payment Method
- If the toggle is enabled, the SPPAX payment will appear in payment setting under store settings.
- If the toggle is disabled, the SPPAX payment will not appear in payment setting under store settings.
- Under Payment Type in Add/Update Payment Method, the SPPAX payment type must be added. It will appear only when the SPPAX payment toggle is enabled under the Admin Payment Settings.
- After selecting SPPAX as a Payment Method, you can configure the Payment Name, Code, Priority, Open Cash Drawer, Enable EBT, and Exempt Surcharge toggles.
- The Debit toggle is available, and will be disabled by default.
- If enabled, the card will be considered as debit.
- If disabled, it is considered as credit card.
- Click Save or Update at the bottom-right. Upon clicking, the SPPAX configuration will be saved/updated.
EMV Settings
Navigation: Log into BO, select a Store, then select Settings > Payments > EMV Settings
- On the EMV Settings page, you can create new EMV Setting by clicking + EMV Settings at the upper-right or update an existing EMV Settings by clicking the corresponding pencil icon. The New / Update EMV Settings pane appears.
- Enter the Name and IP Address.
- For the Type, select SP-PAX from the dropdown. The Auth Key, TPN, and Token fields will appear.
For SPPAX payment, the below mentioned functionalities will work as usual:
- Enable Pre Auth
- Default Pre Auth-Amount
- Enable Extended Pre Auth
- Default Batch
- Enable Gratuity line on the Credit Card Screen
- POS Custom Button
- Cash Discount
- Service Charge
- Manual Submit for Credit Card (Table and Bar Service)
- Tokenize the Credit Card
- Batch Submit Device
- Service Charge - While creating SPPAX payment. if Debit toggle is enabled, no service charge will be deducted and if the toggle disabled it will be considered as credit and based card type service charge configured in the BO, charges will be deducted.
- If the card is debit card, no charge should be deducted.
- Service Charge will calculate only for SPPAX Credit Cards.
- If Cash Discount is enabled for the Store, no charges will be incurred for Debit payments - and Credit Card charges will be deducted if configured.
- Under Default Batch Payment, SPPAX must be added when the SPPAX payment toggle is enabled on the Admin page
- User selects SPPAX as default batch payment in BO.
- On the Batch screen, SPPAX related payments will appear in the batch screen.
- SPPAX will appear in the Type drop down, and you can change the Type if needed.
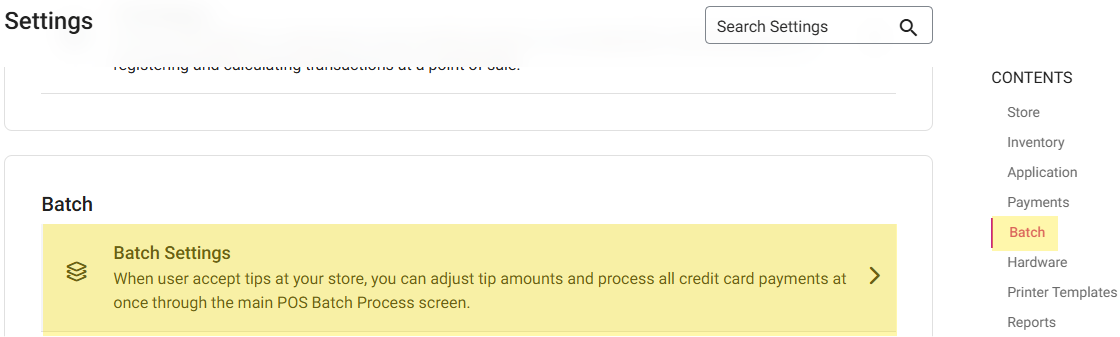
Batch
Back Office
Navigation: Log into BO and select a Store, then select Settings > Batch > Batch Settings
- All Offline transactions will appear under the Batch Setting page in BO, including SPPAX transactions.
- Once offline transactions are processed, they all will be removed from Batch Settings screen in BO.
- Under Auto Batch: if both MPPG and SPPAX are enabled for the Store, then Auto Batch applies to both MPPG and SPPAX payments.
Sample Receipt
Note: The below example Receipt will be supported by bot Star and Epson printers and for both Text and Image.
- For SPPAX Service Charge: the customized Name for the Service Charge - which was configured in the BO - will appear on the Receipt. It will be displayed in the Email Receipts, Payment Summary PDF and in the Receipt Summary in BO.
- The Service Charge will be added and display the Sum under the heading Service Charge if various payment methods are utilized - such as MPPG and SPPAX (regardless of the customized Name configured for Pax or MPPG).
- Example: If there is only SPPAX payment on the Receipt, the Service Charge amount will appear under hardcoded name Service Charge. If there are multiple payments, such as SPPAX and MPPG, both Amounts will be added and shown under hardcoded name Service Charge.
- If you're deleting failed transactions in BO, then they will be removed on the Batch screen (iPad) and shown on the Batch report under failed transactions and a tool tip to indicate Below Mentioned Transactions not settled to Batch.
- For SPPAX payments, the Pre-Auth Receipt will not be available on the Refund screen until it is getting batched.
Implementation in POS
2 types of payment methods available for the SPPAX method:
- Fully Integrated Payment - Linga GO app is installed in the device for sale and payments. You can perform Auth, Payment, Batch submit, Refund, and Void in the device itself.
- Device Name: A77, A920, A920 pro, A800
- Semi Integrated Payment - Separate SPPAX payment device is integrated with POS. You can select items and place the Order in POS. The SPPAX device is used for payment.
- Set the IP address of an SPPAX device in Payment settings available in BO.
- Provide the Device Name, IP Address, Type, and Serial Number to connect the device with POS.
- Device Name: A35, S300, A80
Hardware Settings
Under Hardware Settings:
- A Device must be connected.
- A Payment Type must initially be enabled in Admin Settings for the Store.
- Under Select a Card Reader, all devices will be visible. Select the required Device to connect by IP Address.
- Pre Auth - The section will appear under Card Reader. Select the Device on which Pre Auth must be performed. Pre Auth will occur in POS based on the selection.
- If the Store has only SPPAX, then SPPAX will appear under Pre-Auth. If there are multiple payments, then all payments will appear under Pre-Auth.
- This setting is for Semi-Integrated SPPAX.
Auth
After a Sale is placed in POS:
- The Receipt will go to the Batch screen.
- When Batch Submit is clicked, all payments will be processed.
- Under the Payment section, an SPPAX payment will appear when the payment type is enabled for the Store.
- Provide a Signature.
- When process payment is clicked, tap or swipe or insert the card in device and payment will be completed.
- If no card device is connected, the message 'PAX device is not connected' appears.
- After payment is completed: if the Show Digital Receipt Screen toggle is enabled in the Back Office, the Digital Receipt appears.
- On the Digital Receipt screen, choose whether the receipt/bill needs to be sent via SMS, E-mail or Print.
- After choosing the Receipt option, the Order screen appears - where the Receipt will be sent/printed accordingly.
Payment Process
After the Payment process is initiated in POS:
- The Transaction amount will be sent to the Terminal.
- The Customer Inserts/Swipes/Taps the Card on the Terminal
- The response from the terminal - whether the payment was a success or failure or timed out - will be sent back to the POS.
Payment Success
After initiating the Payment process in the POS:
- The Request will be sent to the SPPAX device
- The Payment processing will start on the Terminal.
- After the Payment is processed, a message will appear on the Terminal.
- In POS, the loader will stop, and the Signature screen followed by the Digital Receipt screen will appear (if enabled)
- The Receipt will be closed - unless it is a partial payment, in which case the Receipt will remain Open.
Payment Failure
During the Payment processing if there is any network failure or No Balance or the device is busy
- The Payment won't be processed in the Terminal and the response will be sent back to the POS.
- The Payment will be considered a failure and message received from the terminal will appear in POS.
Time Out
- The Payment process is started in POS and the Terminal, but the Customer didn’t perform any action (Insert/Swipe/Tap) to submit Card payment.
- The POS will receipt for Time Out Period (30 sec) and payment will be added as failure payment after the 'TIME OUT' error message appears.
- Payment is retrieved by swiping the failure payment:
- If the payment is processed, the payment will close.
- If the payment is not processed, the message 'Payment was not successful. Try to make payment again' appears.
Batch Screen
- Under the Batch screen, all the Transactions will appear under Batch screen.
- SPPAX Auth payments should be visible in BO Batch Screen for batching.
Auto Batch
- The Auto Batch Time is set in BO.
- All the successful payments will process on the Batch screen.
- Auto Batch only applies for Semi Integrated SPPAX payments.
Manual Batch
- The Submit Batch button must manually be clicked. All the Receipts will be processed in BO and will be cleared on the Batch screen.
- Select SPPAX as the Default Batch Payment in BO.
- SPPAX will be added as an option when the SPPAX Payment toggle is enabled on the Admin page.
- On the Batch screen, SPPAX related payments will appear. For the Device drop down: SPPAX will appear, but the Device can be changed if needed.
- The Default Batch Submit Device dropdown in BO contains all the configured Devices. Select the Device which is used to process Batch payments - including SPPAX.
- Note: After initializing Batch from POS, Batch will be processed. During the process, the device must be Online and Connected to POS.
Void
To Void a Payment after it was completed:
- SPPAX must be connected to POS. If no Device is connected: the message 'No PAX is connected to this device' appears.
- The Payment must be deleted on the Payment screen. Then the full Payment will be voided.
- Partial Void is not possible - the full payment on the receipt must be deleted to void the Receipt.
- After closing the Receipt: it will appear in the Closed tab. It can be reopened to delete the Payment, and the Payment will be voided.
- When Manual Submit is enabled: the Receipt will not close - the system will redirect to Payment, and from there the Payment can be deleted and the receipt will be voided.
Refund
- A sale was placed and the customer wants a refund on the payment.
- Navigate to the Closed receipt screen. Enter the Receipt Date and/or Receipt Number then press Search, and it will appear.
- Select a receipt then press Return. The receipt will be opened with Refund Item and Refund All options where you can refund a single item or whole receipt based on the selection.
- A new receipt will be displayed along with the selected item and on the Refund pop up screen will appear and in the return by which displays the Payment Type SPPAX, the Amount will be refunded, and Reason must be provided for refund.
- Once the payment is selected, the Refund Completed popup message will appear.
Note: This applies to both exchange and layaway.
Receipts
Template 2
Template 1
Refund All
Refund 1 Item
Exchange
Void
Related Articles
Retail POS: Side CC Payments
Back Office Payment Methods Navigation: For your Store, select Settings > Payments > Payment Method The Payment Method Credit Card must be enabled in Back Office. If the Credit Card toggle is Enabled, then Side CC appears as a Payment Type option. ...Retail POS: Customer Display Hardware Settings
On the Hardware Settings screen, select the Card Reader tab. The screen displays the device name of the Customer Display which is connected to the POS. Back Office License Settings Navigation: Log into Enterprise, then select Settings. Under Licenses ...Retail POS: Receipt Options - Factor 4
Factor 4 is a Gift Card and a Loyalty Program provider. They empower businesses of all sizes to identify and monetize Customer Loyalty. This article describes the process of integrating Factor 4. Back Office (BO) Navigation: Log into BO and select a ...Retail POS: Operation - Batch
In POS, select Operation then Batch. User Dropdown The User dropdown contains a list of users (employees), allowing you to choose a specific User from the list. Once a User is selected, you can view a list of transactions carried out by that selected ...POS: SPPAX Payments
Back Office (BO) BO Admin Requirements Navigation: Log into BO then select Admin > Stores Under Admin Store(s): When enabling the SPPAX toggle (setting to Yes), the SPPAX Details screen appears. Enter the mandatory details (pax device serial number) ...