POS: Ingenico Payments
Note: Ingenico is available only on Native iPad in Canada.
Back Office Admin
Navigation: Login to BO then select Account > Store
Under the Store's Settings, ensure the Ingenico option is enabled (set to YES).
Back Office
Payment Methods
Note: Ingenico must be enabled in BO Admin
Navigation: Login to BO, and for your Store select Settings > Payments > Payment Method
For your Store's Payment Methods, ensure a Payment Type of Ingenico exists (create a new Payment Method or update an existing one).
- If creating a new Payment Method: after selecting Ingenico as the Payment Type, configure the other mandatory fields.
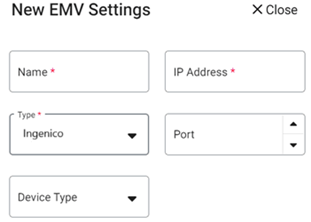
EMV Settings
Navigation: Log into BO, and for your Store select Settings > Payments > EMV Settings
When creating a new EMV Settings: for the Type ensure Ingenico is selected, then configure the other mandatory fields.
Batch Settings:
Note: Ingenico is an option only when the Ingenico Payment toggle is enabled from the Admin page.
Navigation: Login into BO, and for your Store select Settings > Batch > Batch Settings
- If the Print Batch Report toggle is enabled, then the Batch Report will be printed after submitting the Batch.
- Batch Submit Device - select the device used to process batch payments including Ingenico.
- For Default Batch Payment, select the Device as Ingenico.
On the Batch screen: all Ingenico related payments will appear, and Ingenico appears as a Type dropdown option.
POS
Hardware
Settings
Remember: The Ingenico payment type must be enabled in Admin settings for the Store.
- From the Operations screen: tap on Hardware Settings.
- Under the Card Reader tab: all available devices will be visible under Select A Card Reader. Select the Ingenico device.
- Once the Device is connected: a green check mark ✓ will appear to the right of the Device Name.
Payment
- Create a sale, then tap on the Payment
option.
- The Payment screen appears, which displays all the payment options enabled in the Back Office settings.
- Choose the Ingenico payment to perform payment through the device.
- At the bottom of the screen, select Process Payment.
- Tap / Swipe / Insert the card in the device, and payment will be completed.
- If no device is connected, the message 'Device is not connected' appears.
- After payment completion, the Receipt screen appears (if the Show Digital Receipt Screen toggle is enabled in BO).
- Choose whether the Receipt/Bill needs to be sent via SMS, Email or Print, then select Send Receipt. - or if no Receipt is needed select No Thanks.
- After choosing the Receipt option: the page the Order screen appears and the Receipt will be sent/printed accordingly.
Sale
- Place an Order in POS, and the Check will go to the Batch in Ingenico device.
- When the Batch process is completed on the Device, all the payments will be processed.
- In
the Payment section: the Ingenico payment will appear (when the payment type
is enabled for the Store).
- Select Ingenico as the Payment Method then select Process Payment at the
bottom.
- Tap / Swipe / Insert the Card in the Device, and payment will be completed.
Payment Scenarios
- Tap - By default: tap the card and payment will start processing. If this fails, see the Swipe method.
- Swipe - Swipe the card in the card reader device, and the payment will start processing.
- Insert - Press Process EMV and insert the card in the card reader device and then press Process. The payment will be processed on the card.
Payment Process
- After the payment process is initiated on the device, the Transaction amount will be sent to the Terminal.
- On the Terminal: insert / swipe / tap the card, and the response will be sent to the POS - whether the payment is a success or failure or timed out - from the Terminal.
Void
You can void a payment after it's completed. To void a payment after it's completed:
- The Ingenico device must be connected to the POS and the Batch process must not have been completed.
- Delete the payment from the Payment screen, and the full payment will be voided.
- After closing the check, it will be moved to the Closed tab. You can reopen the check then select void.
- The Payment page appears and the message ‘Payment made on this check, kindly delete the payment to void the menu item’ will be displayed.
Batch
For Ingenico device, manual batch is applicable. You can complete the transaction by clicking on the Submit Batch button in POS.
- On the Batch screen: all the successful and offline transactions appear, and Tips for each transaction can be changed or applied on the Batch screen before batching.
- Ingenico payments will appear on the BO Batch screen for batching.
- Auto Batch does not apply to Ingenico payments in POS. You must manually press Submit Batch to process the Checks.
- On the Batch screen: Ingenico related payments appear along with Ingenico as the Device.
- If the Batch is processing: the Submit button at the bottom of the screen will be disabled, and the loading graphic will be displayed until the Batch completes.
- Tip adjustment for authorized payment can be done from the Batch screen.
- All the transactions will appear under the Batch screen, and the Tip can be adjusted on the transaction from the Batch screen.
- After initiating a Batch, a Tip cannot be applied.
Refund
A sale is placed and performed Close Day, and but you need to refund the payment.
- Navigate to the Refund screen.
- On the Refund screen: all the Checks placed on the selected Date will appear.
Refund with Receipt
- Select the check to refund then select the Refund Check button. The Refund pop-up appears.
- On the Refund pop-up screen: all the Payment Types appear - including Ingenico. The Amount to be refunded also appears.
- Provide the Reason to select the Payment Type. If attempting to select Payment Type before a Reason, a pop-up with the message 'Provide reason for Refund' appears.
- After providing a Reason, select the payment then a pop-up with the message 'Do you want to refund?' Confirm Yes or No appears.
- If Yes, the 'Refund Success' pop-up appears.
- If No, you remain on the same screen.
- After the refund: if you select Refund Check on the same check, the message 'Check is already refunded' will appear.
Refund Without Receipt
- Select Refund Without Reference, The Refund pop-up appears.
- On the Refund pop-up screen: all the Payment Types appear - including Ingenico.
- Provide the Reason to select the Payment Type. If attempting to select Payment Type before a Reason, a pop-up with the message 'Provide reason for Refund' appears.
- The Amount to be refunded will not appear on the pop-up. You must manually enter the Amount.
- After providing a Reason, select the payment then a pop-up with the message 'Do you want to refund?' Confirm Yes or No appears.
- If Cash, the 'Refund Success' pop-up appear.
- If Card payment - such as Ingenico - the Card screen appears. On the Card screen: swipe / tap / insert the card (EMV). The Amount will be refunded to the card and the 'Refund Success' pop-up appears.
Refund Menu Item
- When Refund Menu Item is selected: select the Item on which the Amount the Customer wants a refund. Select the Refund Check or Refund Item button.
- After selecting a Menu Item, the Refund pop-up appears, which displays the Amount to be refunded.
- To select the Payment Type, you must first provide a Reason. Otherwise, the ‘Provide reason for Refund’ appears.
- After providing the Reason and the payment method Ingenico is selected, the message ‘Do you want to refund? Confirm’ appears with Yes and No options.
- If Yes is selected: the Refund pop-up will be closed and a 'success' message will appear, indicating the completion of the Refund process.
- If No is selected: you revert to the previous screen.
Payment Functionalities
| Features | Sppax | Mppg | Clover Flex | Evertec | Ingenico / Verifone | ||
| Devices Card Reader EMV Machine Device Model |
S300 A35 A80 A920 (Semi Integrated) |
A77 A800 A920 Pro (Semi/Full Integrated) |
T-Dynamo E-Dynamo (Card Readers) |
Gen 2 / 3 / 4 (Semi / Full integrated) |
Verifone -
VX820 P400 (Semi integrated) T650 (Fully Integrated w/ Linga Go) |
Evertec Gateway | ICT
250 MOVE 5000 DESK 5000 Verifone-V400C V400M (Moneris) |
| Region / Country | US | US | US / Canada | US (Puerto Rico) | Canada | ||
| Platform V6-Android V6-iOS Native iOS Web POS |
V6 (Web, iOS, Android) Native iOS |
V6
(iOS & Android) Native iOS |
V6
(Web, iOS, Android) Native iOS |
V6 (iOS & Android) | OLO (Web Checkout) | Native iOS | |
| Processors Supported | TSYS FDMS Heartland EPX |
TSYS FDMS Heartland EPX |
TSYS FDMS WorldPay / Vantiv |
FDMS | Evertec | Global
Canada Chase Canada Moneris Canada |
|
| Connection Type | IP | IP | BLE / USB | IP | IP | (N/A) | IP |
| Sale EMV / Manual / Swipe |
No | No | Yes | Yes | No | Yes | Yes |
| Auth EMV/ Manual / Swipe |
Yes | Yes | Yes | Yes | Yes | No | |
| Refund | Yes | Yes | Yes | Yes | Yes | No | Yes |
| Offline Mode | No | No | Yes | No | No | No | No |
| Tokenize | No | No | Yes | No | No | Yes | No |
| Void | Yes | Yes | Yes | Yes | Yes | No | Yes |
| Auto Batch | Yes | Yes | Yes | No | Yes | No | No |
| Manual Batch | Yes | Yes | Yes | Yes | No | Yes | |
| Tip Adjustment | Yes | Yes | Yes | Yes | Yes | No | No (Only Pre Tip) |
| Pre-Auth Extended / Incremental |
Yes | Yes | Yes | No | No | No | No |
| Factor 4 | Yes (TSYS & FDMS Processors only) |
No | No | No | No | No | |
| EBT | Yes (TSYS & FDMS Processors only) |
No | Yes | No | No | No | |
| Linga Gift Card | No | Yes | No | No | No | No | |
| Additional Details | * TSYS, Heartland, and EPX DO NOT have the Pre Auth
option. * Pre-Auth is available with First Data Rapid Connect and First Data Omaha. * Post Tip Adjustments on Pre-Auth transactions will only be available with Omaha and not with Rapid Connect. |
* After
failure attempts, the device will have the Swipe scenario. * Pre Auth will be available for TSYS and First Data only. * Post Tip Adjustments on Pre-Auth transactions will only be available with Omaha and not with Rapid Connect. |
* Auth is not available for Clover Canada. | ||||
Related Articles
POS: Operation - Till Management (Till Tab)
The Till tab displays the following sub-tabs: Set Till Active Till Held Till Closed Till Set Till Set Till Setting a Till is entering the amount to Till starts with. Select Set Till, and the Open Till window appears. Enter the Denomination and Tip ...Retail POS: SPPax Payments
Back Office (BO) BO Admin Requirements Navigation: Log into BO then select Admin > Stores Under Admin Store(s): When enabling the SPPAX toggle (setting to Yes), the SPPAX Details screen appears. Enter the mandatory details (pax device serial number) ...POS: Clover Payments
Configuration in Back Office Admin On the Admin page, enable the Clover Payment toggle (set to YES). Configuration in Back Office Navigation: Select Settings > Payment > Payment Method Payment Method When creating a new Payment Method (or updating an ...Retail POS: Clover Payments
Configuration in Back Office Admin On the Admin page, enable the Clover Payment toggle (set to YES). Configuration in Back Office Navigation: Select Settings > Payment > Payment Method Payment Method When creating a new Payment Method (or updating an ...POS: Payments - Offline Mode
POS Navigation: Log into POS, then select POS Operations > POS Settings On the POS Settings page: the Offline Mode toggle appears and will be disabled by default. It is for switching the device from Online to Offline. If enabled, then the system ...