Back Office: Enterprise - Push/Pull Data
- Sign into the Back Office.
On the left-side Navigation Panel, click Enterprise.
On the Enterprise page, click Central Inventory then select Push/Pull
Data.
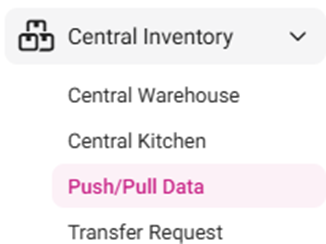
The Push/Pull Data screen appears, where data
can be pulled from one Store/Central Inventory/Central Warehouse to be pushed
to another.
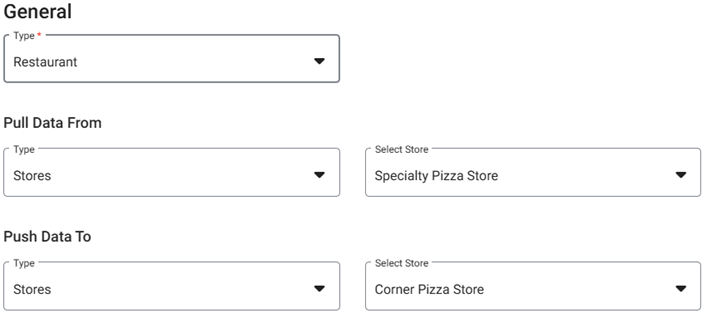
- General
- Select the Type – Restaurant or Retail
- Pull Data From –
where the data will be pulled from
Select the Type from the dropdown.
If the General
Type was Restaurant, the options will be Stores, Central
WareHouse, or Central Kitchen.
If the General
Type was Retail, the options will be Stores or Central
WareHouse.
Select the Store from the dropdown – options
will be based on the adjacent Type selection.
Tip: Find your desired Store more
quickly by typing the name in the Search bar.
- Push Data To
– where the data will be pushed to.
Select the Type from the dropdown.
If the General
Type was Restaurant, the options will be Stores, Central
WareHouse, or Central Kitchen.
If the General
Type was Retail, the options will be Stores or Central
WareHouse.
Select the Store from the dropdown – options
will be based on the adjacent Type selection.
- Tip: Find your desired Store more
quickly by typing he name in the Search bar.
- Note: The Store
selection for Pull Data From cannot be the same as Push Data To.
- When the General Type and both the Pull Data
From and Push Data To selections have been made, select Pull Menu
Configuration at the upper-right.
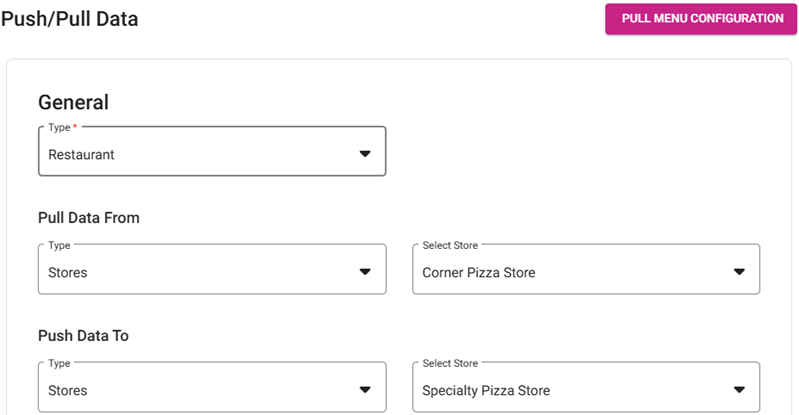
After a moment to load (spinning circle on screen) the
data will be pulled from the Pull Data From selection and pushed to the Push
Data To selection, and the ‘Data Pulled Successfully’
confirmation banner appears.

Related Articles
Retail Back Office: Enterprise - Push/Pull Data
Navigation: Sign into the Back Office. On the left-side, select Enterprise. On the Enterprise page, select Central Inventory then Push/Pull Data. The Push/Pull Data screen appears, where data can be pulled from one Store/Central Inventory/Central ...
Back Office: Enterprise - Home
Sign into the Back Office. On the left-side Navigation Panel, click Enterprise. For a moment, your data will load while the banner ‘Please wait while preparing your enterprise metrics’ appears. Then, the Enterprise page appears. On the Enterprise ...
Back Office: Enterprise - Reports
Sign into the Back Office. On the left-side Navigation Panel, click Enterprise. Then click Enterprise Reports. Under Enterprise Reports are options to access specific reporting Dashboards: Enterprise Reports Sale Report The Sale Report dashboard ...
Retail Back Office: Enterprise Dashboard
Navigation: Sign into the Back Office. On the left-side Navigation Panel, click Enterprise. For a moment, your data will load while the banner ‘Please wait while preparing your enterprise metrics’ appears. Then, the Enterprise page is populated. On ...
Back Office: Enterprise - Sync Inventory
Sign into the Back Office. On the left-side Navigation Panel, click Enterprise. On the Enterprise page, click Central Inventory then select Sync Inventory. The Sync Inventory page appears, which highlights the benefits that come with a fully synced ...