Back Office: Inventory - Modifiers
Sign
into the Back Office.
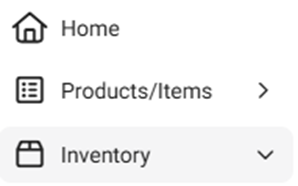
On the left-side Navigation Panel, click Inventory
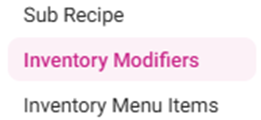
then Inventory Modifiers.


The
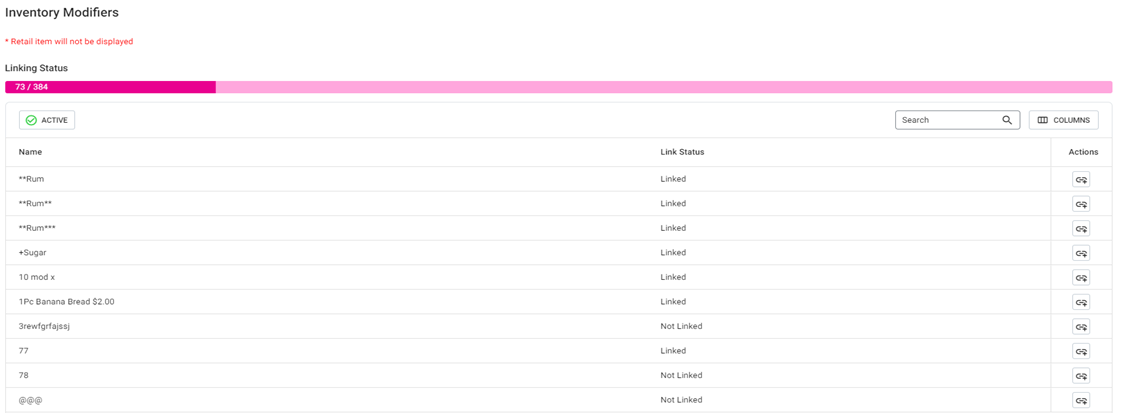
Inventory Modifiers page appears, which contains a table of existing Modifiers
– organized by Active/Inactive status.
This
is where you link Modifiers to Inventory Items, Sub Recipes
or Menu Items.

Active By
default, the button will be set to Active and all Active Modifiers
appear.
Select Active to change to Inactive, and
display any deleted Modifiers. If no deleted Modifiers appear,
the message Modifiers not found appears in the body of the table.

Select Inactive to change back to Active.
A pop-up appears which shows ‘Are you sure you want to activate this item’ with Cancel and
Yes, Activate options.
Yes, Activate:
the ‘Modifier Activated
Successfully’ pop-up appears.
Cancel:
the pop-up will be closed.
The
Table contains the following columns:
Name – The name of the Inventory
Modifier.
Link Status – Indicates whether
the Modifier is Linked or Not Linked.
Actions – Click the button to create a Link to
the corresponding Modifier.
The
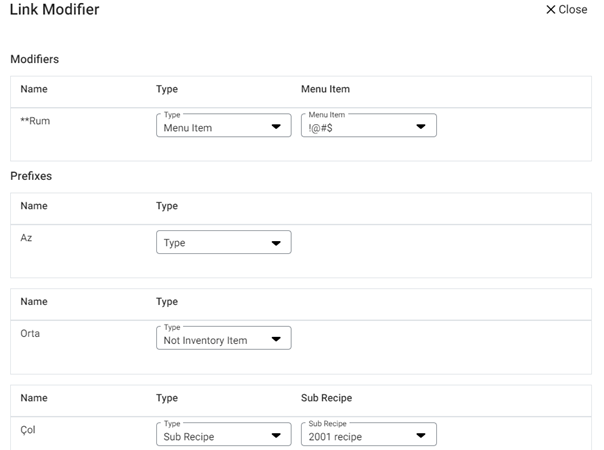
Link Modifier pane appears, which displays Modifiers and Prefixes.
Modifiers – Select the Type from the
dropdown.
If Item is
selected, select the Category then Item from the dropdowns that appear.
If Sub Recipe
is selected, select the Sub Recipe from the dropdown that appears.
If Menu Item is selected, select the Menu Item from the dropdown that appears.
Prefixes
– Select the Type
from the dropdown.
If
Item is selected, select the Category then Item from the dropdowns that appear.
If Sub Recipe
is selected, select the Sub Recipe from the dropdown that appears.
When
ready to link the Modifier, click Link Modifier at the
bottom-right of the pane.
Click Cancel or X Close to close
the pane without linking the modifier.

You
are returned to the main Inventory Modifiers screen, where the
corresponding Link Status of the item shows as Linked and the
confirmation message ‘Inventory Modifiers Updated Successfully’
appears at the upper-right of the screen.

Related Articles
Back Office: Inventory - Inventory Item
Sign into the Back Office. On the left-side Navigation Panel, click Inventory then Inventory Item. The Inventory Item page appears, with tabs for Inventory Items and Retail Items – along with a Select Categories dropdown and a Total Value On Hand. ...
Back Office: Inventory Reports
Log into the Back Office and select a Store. Under Reports > Inventory Reports. On the Inventory Reports dashboard, select a tab. Master Stock Purchased Item Consumption Log Compare Inventory Count Sheet COGS Adjust Inventory Inventory Item History ...
Back Office: Inventory - Menu Items
Sign into the Back Office. On the left-side Navigation Panel, click Inventory then Inventory Menu Items. The Inventory Menu Items page appears, which displays a tab containing All items then additional tabs for the items that are Linked and Unlinked. ...
POS: Modifiers
Modifiers allow you to customize orders and provide options for your customers. If a Menu Item is configured with Modifiers, the screen appears as below: You can select any one of the Modifiers by tapping on it. Mandatory Modifier Mandatory Modifiers ...
Back Office: Enterprise - Menu Configuration
Sign into the LingaPOS Back Office at mystore.lingapos.com. On the left-side Navigation Panel, click Enterprise. Then click Menu Configuration. Menu Configuration allows you to transfer data from one Store to other Stores to eliminate duplicate ...