POS: Operation - Scale Hardware Settings
Back Office
Connecting the Printer to the Scale
- On the Scale: connect the DB9 male side of the cable to the highlighted port. Connect the port supply to the highlighted port.
- Connect the scale cable to the Printer.
- Below is the Device Tag for the Epson Tm-T88VI-iHUB model M349A you should be using.
- Connect the other side of the scale cable with the DB9 female side of the Cable to the highlighted port of the Printer.
Setup of Epson / CAS Scale
- Open an internet browser and enter the IP Address of the Printer to be configured.
- On the Sign in pop-up that appears:
- For the Username: enter epson.
- For the Password: enter the Serial Number of the Printer (example below).
- Click Sign in.
- On the EpsonNet Config screen: on the left-side pane, under TM-Intelligent select EpsonNet Config for TM-i.
- On the next screen: under Device Admin, select Serial Device.
- On the Device Admin screen, the Printer must be set to the following:
- Baudrate - 9600
- Stop bit - 1
- Data bit - 7
- Parity - Even
- Force close the app on the device to make sure it is not connected to the printer and leave the app closed. Then press Test.
- On the left-side box: enter W/r, then press Send.
- After pressing Send, close that tab.
- After the tab is closed: on the Device Admin screen at the upper-right press Apply & Restart.
- On the Confirm pop-up that appears: click OK.
- Let it continue until the screen goes away and the Printer will be flashing while it is applying the changes.
- When complete it will return to the main screen.
POS
Navigation: Log into POS, then select POS Settings > Hardware Settings
- Select Printer Settings tab. Under the Receipt Printer Settings section, select the Printer/Scale that is connected to the Terminal.
- Note the IP Address of the Printer (below example is 192.168.2.124).
- Select the Scale tab. Enter the IP Address of the Printer then press Connect.
- Once connected, the 'Printer connected successfully' pop-up appears.
- To test the scale's connectivity (with or without weight on the scale) it will provide a reading accordingly.
- Note: The Scale is available only in iPad.
CAS Scale
Navigation: Log in to POS, then select Operation > Hardware Settings > Scale
Two toggles will be available, and both will be disabled by default:
- Non-Integrated Scale Device
- If enabled, the application won't check for a Scale device and allows you to enter the weight manually.
- If disabled, then you can enable the USB Scale Device toggle, and the application will check for a Scale device. If a Scale device is not connected, the message 'Scale device is not connected' appears.
- If the Non-Integrated Scale Device toggle is enabled, the USB Scale Device toggle will automatically be disabled and vice-versa.
Connect Button
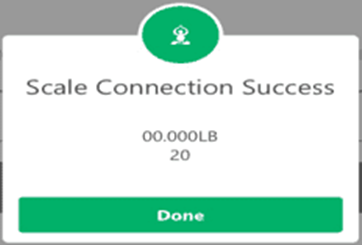
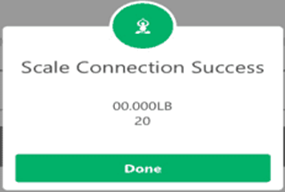
Once connected: the pop-up message 'Scale Connection Success' appears.
If the Scale device is disconnected while placing an order: the pop-up message 'Scale device is not connected' appears at the upper-right.
Test Connectivity
If Test Connectivity is clicked and the Scale device is connected: the message 'Scale connection success' appears - with or without weight on the scale - and will give the corresponding Weight value.
Toggles
Note:
- Non-Integrated Scale Device toggle is enabled, the Get Weight and Get Tare buttons will be greyed out
- Non-Integrated Scale Device toggle is disabled, the USB Scale Device toggle is enabled and all the fields can be visible and clickable.
- Scale Menu Items apply only to Scale functionality.
Non-Integrated Scale Device toggle is DISABLED and USB Scale device toggle is DISABLED
A Scale Menu Item is selected:
- If the Scale Device is not connected, the message 'Scale device is not connected' appears with the OK option.
- Once OK is selected: enter the Weight manually in POS then click Done.
- The Order screen appears and displays the Menu Item Name, Weight, Quantity and Price.
Non-Integrated Scale Device toggle is ENABLED and USB Scale device toggle is DISABLED
If the Non-Integrated Scale Device toggle is enabled, the application will not look for a Scale Device.
- Enter the Weight manually in POS.
- Select a Scale Menu Item from the Order screen. Manually enter the Weight, then click Done.
- You are reverted to the Order screen which displays the Menu Item Name, Weight, Quantity and Price.
Non-Integrated Scale Device toggle is DISABLED and USB Scale device toggle is ENABLED
- Connect the Non-Integrated Scale Device to POS via USB.
- Since the Non-Integrated Scale Device toggle is disabled, the application will check for whether the Scale is connected.
- If a Scale is not connected: select a Scale Menu Item from the Order screen. The application will check for a Scale Device and display the message 'Scale device is not connected'. Enter the Weight manually in POS and the Scale Item Tare screen appears. If the USB Scale Device toggle is enabled and the Scale is connected successfully: then when the Menu Item is placed on the Scale Device and Get Weight is clicked, the Weight will be displayed along with the placed Menu Item Weight and Price on the Order screen. If a Tare Group is assigned to a Menu Item, the values will be set as default, and the Menu Item will automatically be placed on the Order screen, and the Scale Item Tare screen won't appear.
- If the Scale Device is connected and a Tare Group that is assigned to a Scale Menu Item is selected: if Weight is not placed on Scale Device. the menu item name, weight, quantity and price 0.00 will appear in POS.
- If 0.000 is entered then Done is clicked, the message 'Item weight cannot be negative or zero' will appear in POS.
Back Office
Navigation: Log into the BO for your Store, then select Settings > Hardware > Kitchen Printer
Under the Settings tab, see the Serving Size in Front of Menu in KOT toggle:
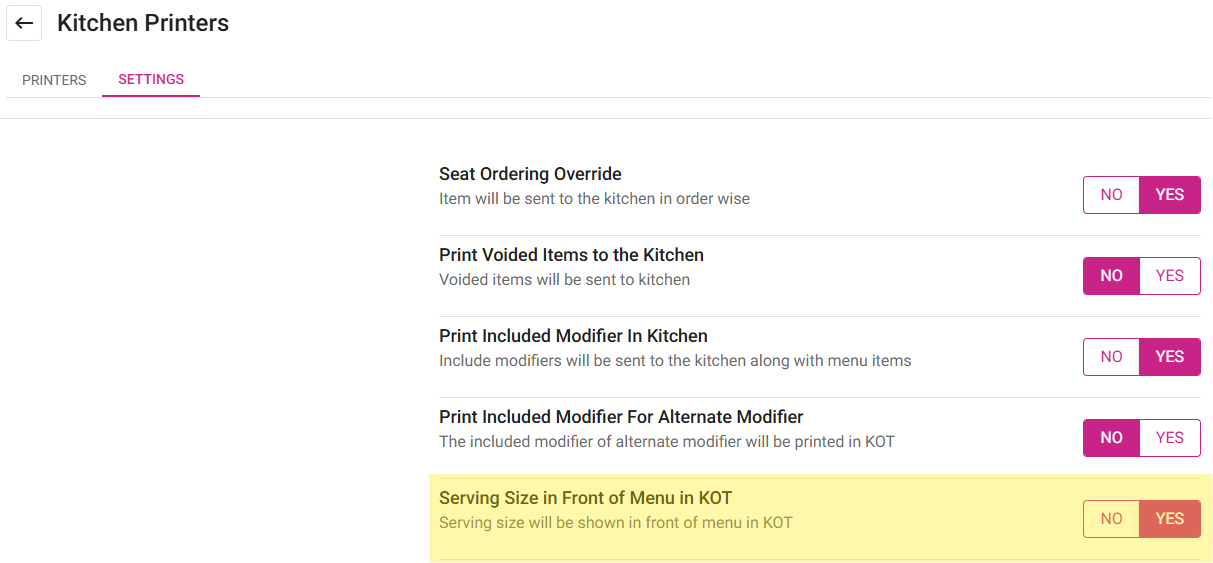
- If the toggle is enabled (set to YES) then the metrics will appear before the Menu Item in POS.
- If the toggle is enabled (set to NO), then the metrics will appear after the Menu Item in POS.
Related Articles
Retail POS: Scale Hardware Settings
Navigation: Log in to POS. Select Operation then Hardware Settings. On the Hardware Settings page, select the Scale tab. Toggles The Scale tab displays two toggles: Non-Integrated Scale Device and USB Scale Device. If Non-Integrated Scale Device is ...Retail POS: Hardware Settings Overview and Recommended Devices
In POS, select Operation then Hardware Settings. Note: Only employees with the proper role and permission settings have access to the Hardware Settings screen. The Hardware Settings screen displays the following tabs: Card Reader Printer Settings ...Retail POS: Operation - Print Labels
Setting Up a Label Printer Back Office Before printing labels in POS, you must first have Label Printers configured in Back Office. Navigation: Log into the Back Office for your Retail Store. Select Settings. Then under Hardware, select Label ...POS: Operation - Printer Hardware Settings
Back Office For more information on Printer and Receipt Template settings, see the following Knowledge Articles: Receipt Printers Kitchen Printers Kitchen Receipt Template Assigning a Kitchen Printer to a Menu Item Navigation: Log into BO, select a ...Retail POS: Printer Hardware Settings
Back Office For more information on Printer and Receipt Template settings, see the following Knowledge Articles: Receipt Printers Front End Receipt Template Label Template POS On the Hardware Settings page, select the Printer Settings tab. It ...