Shogo Integration
Subscribe and Configure
in Back Office
Page
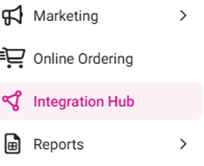
Navigation: Log
into Back Office. On the left-side pane: select Home then Integration
Hub.
- On
the Integration Hub page, select Browse
and Subscribe Integrations.
- Under the Inventory Management section:
for Shogo select Add.
- After selecting the Terms and Conditions box at the bottom-left, click Confirm at the upper-right.
- On
the Current Integrations page: navigate to the row with Shogo,
then under the right-side Actions column select the Settings (gear) icon. The ‘No
configuration required’ pop-up appears.
Connecting Linga to Shogo
- Log in to your Shogo account.
- Navigate to Settings, then Stores.
- Click Add New Store on the top-right corner (even if you don’t have a new Store to add).
- Choose LINGA from the POS list.
- Enter the Username and Password that you use to log into the LINGA Back Office.
- Enter your API Key then click Connect.
- After you connect, Shogo will finalize the connection to Linga and send you a Next Steps email as confirmation that the connection has been established.
Notes
- Shogo will use your Linga Username
and Password to connect the Shogo app to Linga for initial setup: obtaining
details from Linga and setting up your locations in Shogo.
- If you add another location
after your initial setup, you will need to re-enter your Linga Username and
Password so Shogo can obtain your location details from Linga.
- Shogo does not store your
Linga Username and
Password in their system. The information is only used to
connect to your POS and obtain location information.
Guidelines After Integration
Once Shogo is enabled in the Integration Hub,
follow the steps below to integrate:
- Retrieve the API Key
from the Integration Hub, then provide the Store ID to Shogo.
- For the Store ID you must contact the Support team.
Enterprise
Store
Navigation: Log into Back Office, then
select Integration Hub > Developer API Key
Pro Store
Navigation: Log into Back Office, then
select Integration Hub > Developer API Key
Related Articles
Magento Integration
Magento Integration – User Manual PLEASE READ THIS MANUAL BEFORE INTEGRATING MAGENTO WITH THE POS APPLICATION TO ENSURE THE SYNCHRONIZATION PROCESS RUNS SMOOTHLY. See the attached file for a copy of this manual, which includes screenshots for a ...Wix Integration Manual
Wix Integration – User Manual PLEASE READ THIS MANUAL BEFORE INTEGRATING WIX WITH THE POS APPLICATION TO ENSURE THESYNCHRONIZATION PROCESS RUNS SMOOTHLY. See the attached file for a copy of this manual, which includes screenshots for a visual ...Octopus Integration – User Manual
Octopus Integration – User Manual 1. About This Manual v This manual documents how to connect Octopus to the Linga application. v Please read this manual before integrating Octopus with Linga to ensure proper synchronization. 2. Implementation In ...Restaurant365 Integration
Subscribe to and Configure Restaurant365 in Back Office Page Navigation: Log into Back Office. On the left-side pane, select Home then Integration Hub. On the Integration Hub page, select Browse and Subscribe Integrations. Under the Inventory ...ADP Integration
Subscribe To and Use the ADP Integration 1 Linga in ADP Marketplace 1.1 Log in to ADP and Launch Linga Connector Log in to Run powered by ADP. At the bottom-left, click the ellipsis […] then select ADP Marketplace. Once it’s launched, replace the URL ...